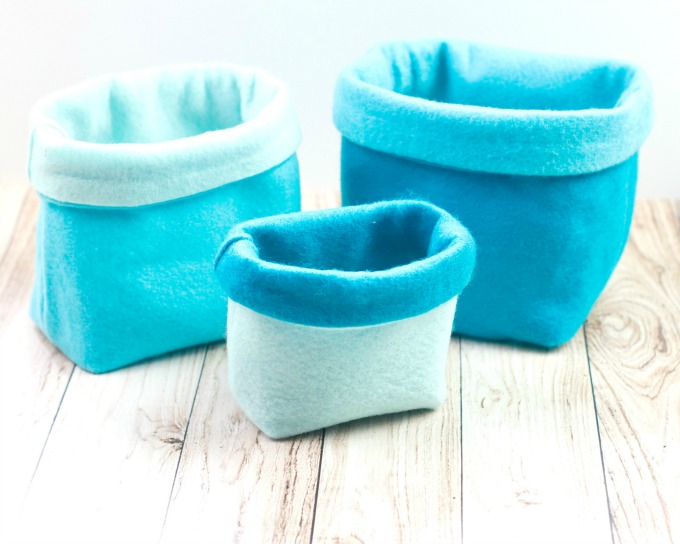
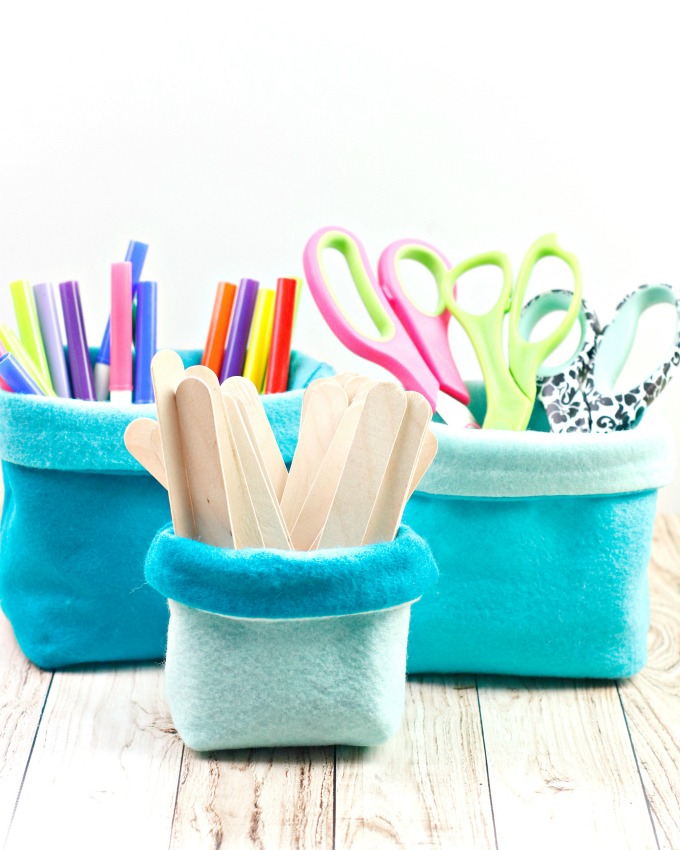
I’m always looking for cute ways to organize my items and these DIY felt buckets to sew may be just the answer. They look great, and are a budget friendly way to create a lot of storage options.
Even better, you can make them in several sizes for different items. Need to store small items? Make a little bucket, like these easy to sew homemade felt baskets.
We’re providing sizes for three popular sizes of these DIY felt buckets to sew, but you can easily resize the pieces you need. Make a tiny one to store paperclips or jewelry. The possibilities really are endless. You can organize and store anything from office supplies to beauty products or craft supplies to random tchochkies and trinkets. The possibilities are endless. Plus, they’re really cute and the colors can be adjusted to fit in with your décor.
How to Make DIY Felt Buckets to Sew
Links may be commissioned.
There are some things you’ll want to pick up before starting on your homemade felt storage baskets. First, you’re going to want felt. You can buy felt by the yard, or in pre-cut sheets. I generally find that the felt yardage is a better quality than felt sheets. I also personally like felt that has some wool content. These don’t need to be 100% wool felt, but the added wool content lends a nicer hand to the felt.
Sharp scissors and/or a rotary cutter will make this project so much easier. When doing any kind of sewing project, sharp scissors are pretty much a must have. A rotary cutter is also a great tool for these felt storage buckets, as they have straight lines. I like the kind of rotary cutter that has a loop handle rather than just the straight handles. Remember to use a self-healing mat with your rotary cutter to protect your workspace. This is a great all-in-one rotary cutter set too.
You’ll also need a turning tool. Now, you can buy one, or you can use something you have at home. I often use a large knitting needle or even a chopstick or long handled makeup brush that’s clean.
Easy Felt Storage Baskets to Sew
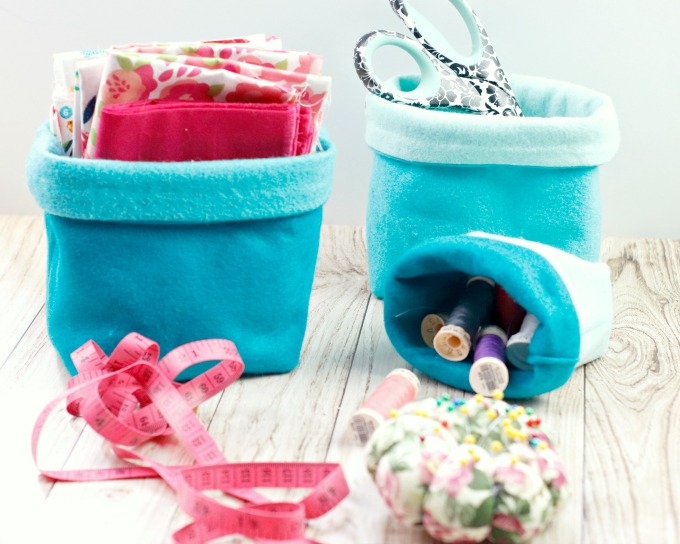
Make these great DIY Felt buckets or baskets to organize your home in style. They’re fairly easy to sew, and you can make a ton of them in an afternoon.
Materials
- 2 each- 9×12 pieces of felt in your choice of color for outside of bucket (you’ll need at least 25×25 cm, which is 10×10 inches square)
- 2 each – 9×12 pieces of felt in your choice of color for inside of bucket
- Cotton or Polyester thread in a coordinating color
Tools
- Sewing Machine
- Sewing scissors
- Sewing pins or wonder clips
- Turning tool
- Cutting Mat
- Rotary Cutter
- Ruler
- Iron and Ironing Board
- Disappearing Marking Pen
Instructions
Step 1: Cut your 2 pieces for the outside of the bucket and the lining in the following sizes. Lining and outside pieces are cut exactly the same, so you’ll end up with 4 pieces of felt that are the same size. Mark these with a disappearing ink pen before cutting.
Large –
9”x9” square. At the bottom edge, cut a 2” x 2” square at each bottom corner.
Medium
– 8”x8” square. At the bottom edge, cut a 1 ¾” x 1 ¾” square at each bottom corner.
Small –
7”x7” square. At the bottom edge, cut a 1 ½” x 1 ½” square at each bottom corner.
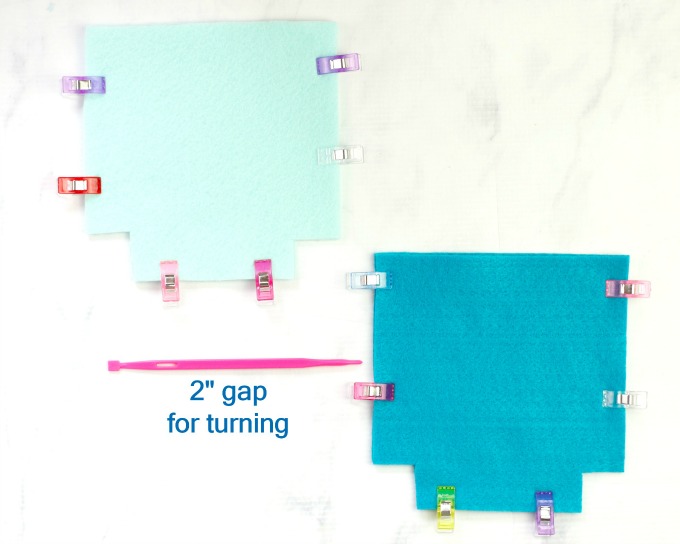
Step 2:
Pin or clip your pieces and using a 1/2” seam allowance, sew along the sides and bottom of your outer main piece.
Leave the bottom notched corners open. Repeat for sewing the lining, except leave a 2” gap for turning, in the side seam, about an inch from the bottom notch. Press your side seams open.
Step 3:
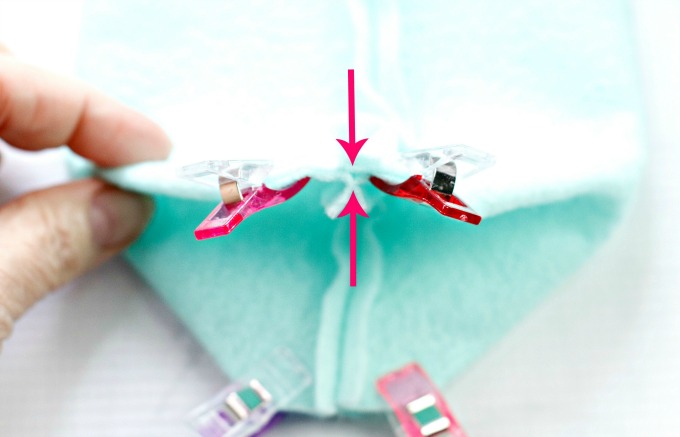
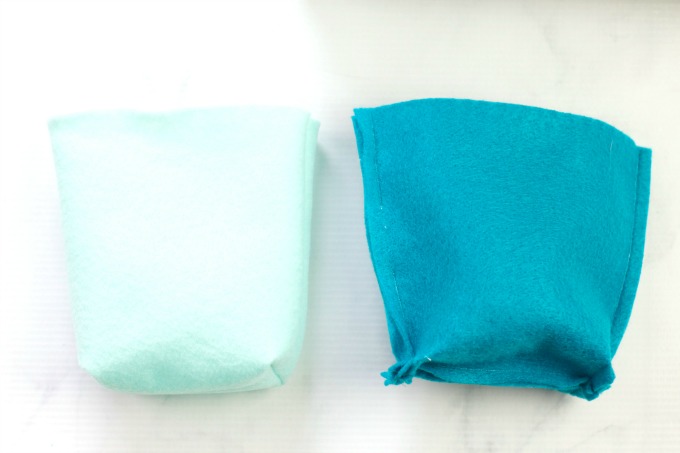
Make a box corner for both the outer piece and the lining. Do this by pinching the opening of the corners and lining up the side and bottom seam for each side. Using a ¼” seam allowance, sew across the opening the opening. Trim corners to reduce bulk.
Step 4:
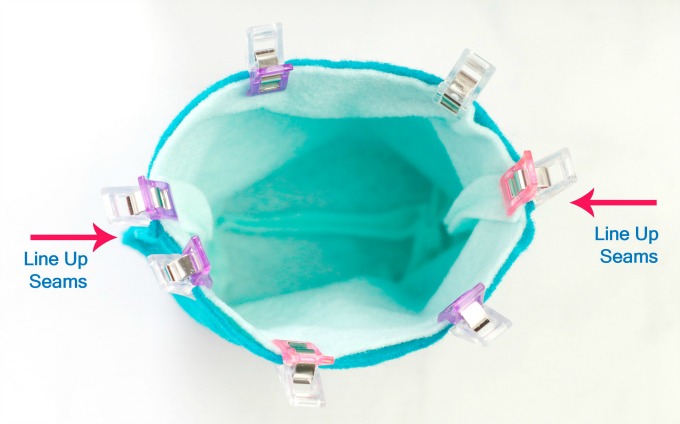
Fit the outside bucket and lining together by leaving the outside bucket inside out and the lining right side out. Place the outer bucket inside the lining, so that right sides are together. Match up the side seams and pin or clip into place. Sew the inner and outer bins together by going around the top. Press all seams.
Step 5:
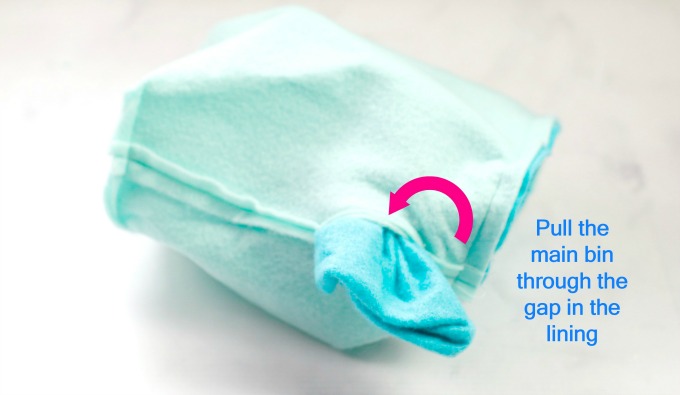
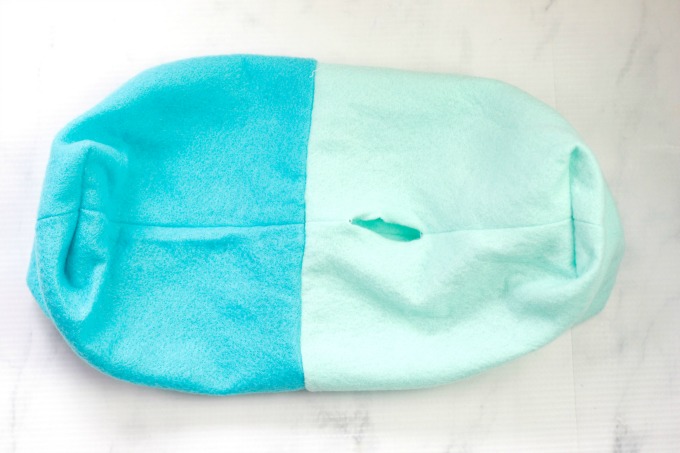
Gently pull the main bin through the opening in the lining bottom, until both pieces are completely right side out. At the opening, turn the raw edged inside, and topstitch or hand stitch close to the opening. Press all seams again.
Step 6:
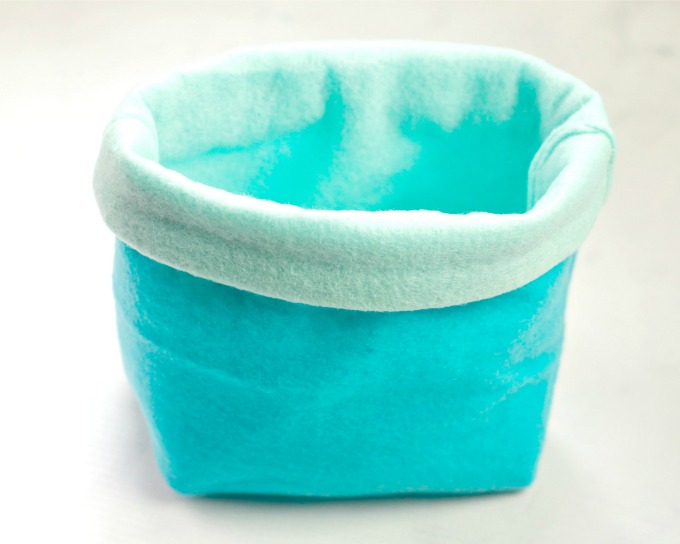
Insert the lining into the outside bucket and match side seams and bottom seam and press again. If you like, top stitch the top edge. Fold the top edge down about ¾” (the lining will show as a decorative detail) and enjoy your new buckets.
See how easy that is? And once you get the hang of it, you can whip these DIY felt buckets out in absolutely no time. They’d be a great craft show seller or item for an Etsy shop, too. They also make a great gift, either as a set, or filled with other little goodies and treasures. If you’re making a lot of these felt storage baskets and bins, you can even make them assembly line style. Especially since the outside and the lining are the same.
Make these great DIY Felt buckets or baskets to organize your home in style. They're fairly easy to sew, and you can make a ton of them in an afternoon. Step 1: Cut your 2 pieces for the outside of the bucket and the lining in the following sizes. Lining and outside pieces are cut exactly the same, so you'll end up with 4 pieces of felt that are the same size. Mark these with a disappearing ink pen before cutting. Large - Step 2: Fit the outside bucket and lining together by leaving the outside bucket inside out and the lining right side out. Place the outer bucket inside the lining, so that right sides are together. Match up the side seams and pin or clip into place. Sew the inner and outer bins together by going around the top. Press all seams. Step 5:Easy Felt Storage Baskets to Sew

Materials
Tools
Instructions
9”x9” square. At the bottom edge, cut a 2” x 2” square at each bottom corner.
Medium
- 8”x8” square. At the bottom edge, cut a 1 ¾” x 1 ¾” square at each bottom corner.
Small -
7”x7” square. At the bottom edge, cut a 1 ½” x 1 ½” square at each bottom corner.
Pin or clip your pieces and using a 1/2” seam allowance, sew along the sides and bottom of your outer main piece.
Leave the bottom notched corners open. Repeat for sewing the lining, except leave a 2” gap for turning, in the side seam, about an inch from the bottom notch. Press your side seams open.
Step 3:
Make a box corner for both the outer piece and the lining. Do this by pinching the opening of the corners and lining up the side and bottom seam for each side. Using a ¼” seam allowance, sew across the opening the opening. Trim corners to reduce bulk.

Step 4: 
Gently pull the main bin through the opening in the lining bottom, until both pieces are completely right side out. At the opening, turn the raw edged inside, and topstitch or hand stitch close to the opening. Press all seams again.
Step 6:
Insert the lining into the outside bucket and match side seams and bottom seam and press again. If you like, top stitch the top edge. Fold the top edge down about ¾” (the lining will show as a decorative detail) and enjoy your new buckets. 
