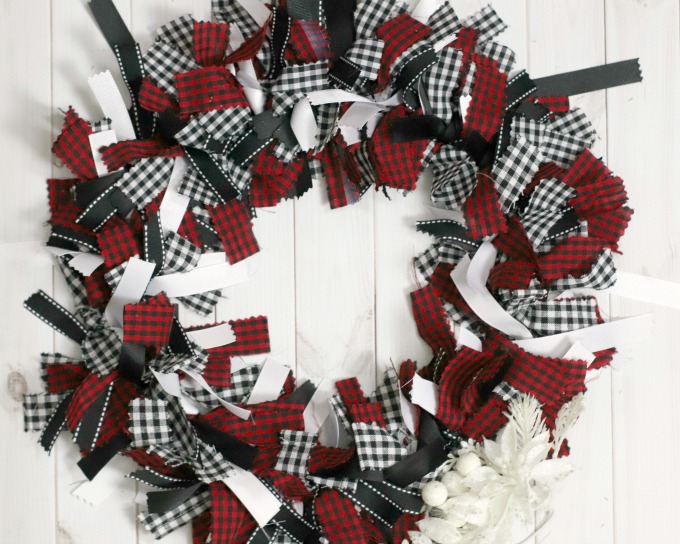
This DIY buffalo plaid wreath makes a great holiday decoration for your door. Combining the classic look of buffalo plaid with red for the holidays and block to keep things modern, this DIY buffalo plaid wreath is the best mix of both old and new. All you need are some fabrics and a few tools to create this wreath that features a new take on an old favorite.
I’ve always loved wreaths. Ever since I was a kid, they’ve been the thing that gets me in the holiday spirit. There’s just something about these decorative rings hanging on doors that fills me with the all the holiday feels. Maybe it’s because I love old school Christmas movies, and wreaths were always an old-timey decoration favorite.
Maybe I saw one when I was very young and it just stuck with me. Maybe I love them just because, but in any event, they are the thing that makes Christmas merry and bright for me. I want to show you how to make this classic chic holiday wreath so you can have your own front door decoration that you made yourself!
DIY Buffalo Plaid Wreath Tutorial
You’ll need a few supplies to make this wreath, but don’t be dismayed at seeing things like a rotary cutter and pinking shears. This DIY buffalo plaid wreath is actually fairly easy to make. The rotary cutter is just for quickly cutting the fabric, and the pinking shears give the edges that zig zag look. All in all, creating this wreath isn’t hard, and you end up with a festive, modern wreath that will look great on just about any door.
Links may be commissioned.
Supplies:
- 1 18” wire wreath form
- ½ yard of red and black buffalo plaid fabric
- ½ yard of white and black checked fabric
- 1 spool of 1/2” wide white ribbon
- 1 spool of 1/2” wide black ribbon
- 1 spool of 3/8” wide red or black patterned ribbon
- Pinking shears and ruler or rotary cutter and mat
Instructions:
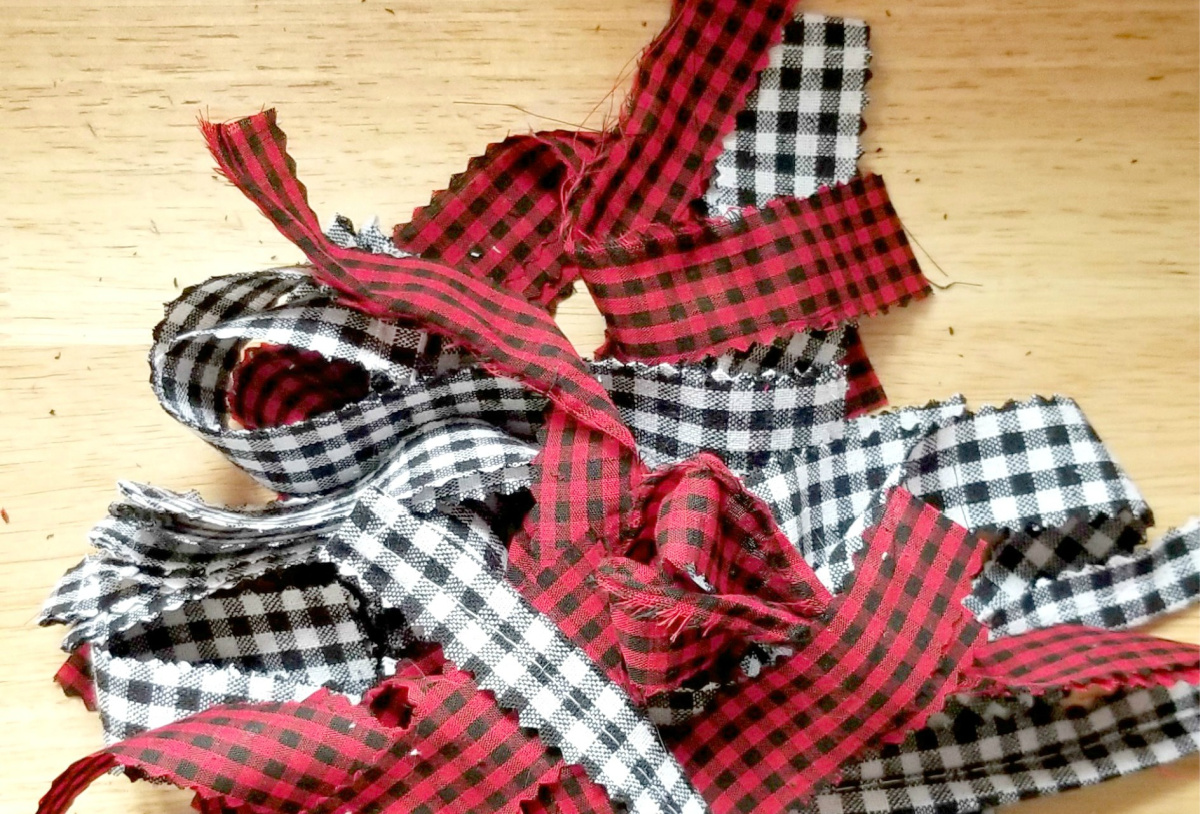
Step 1: Using a rotary cutter and mat, cut your fabric into ½” wide by 9” long strips. You can also cut a slit in your fabric and tear your strips. They’ll tear fairly straight and have a little more rustic look to them. For an alternative look, you can use pinking shears. This gives the zigzag edge and prevents your ribbon and fabric from fraying.
Step 2: Cut your ribbon into 9” pieces using pinking shears.
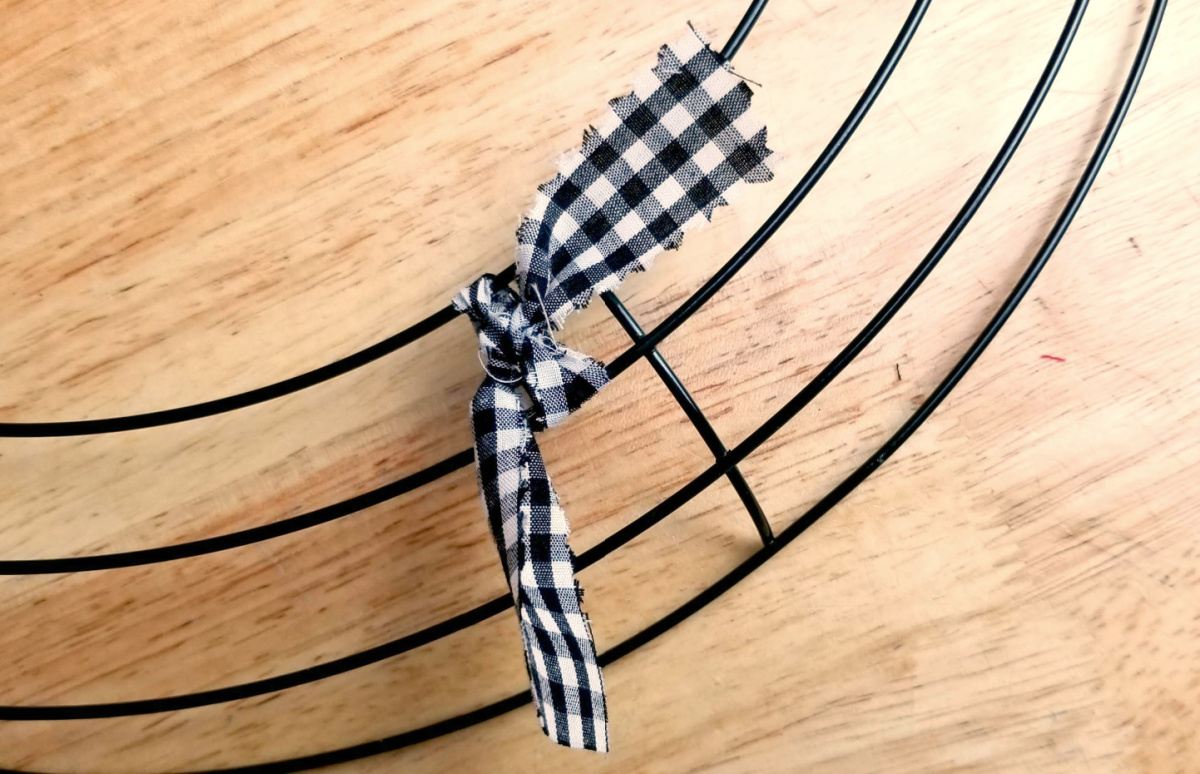
Step 3: Starting at the bottom, take a piece of red buffalo plaid fabric and knot around the 1st and 2nd rings of the wreath form.
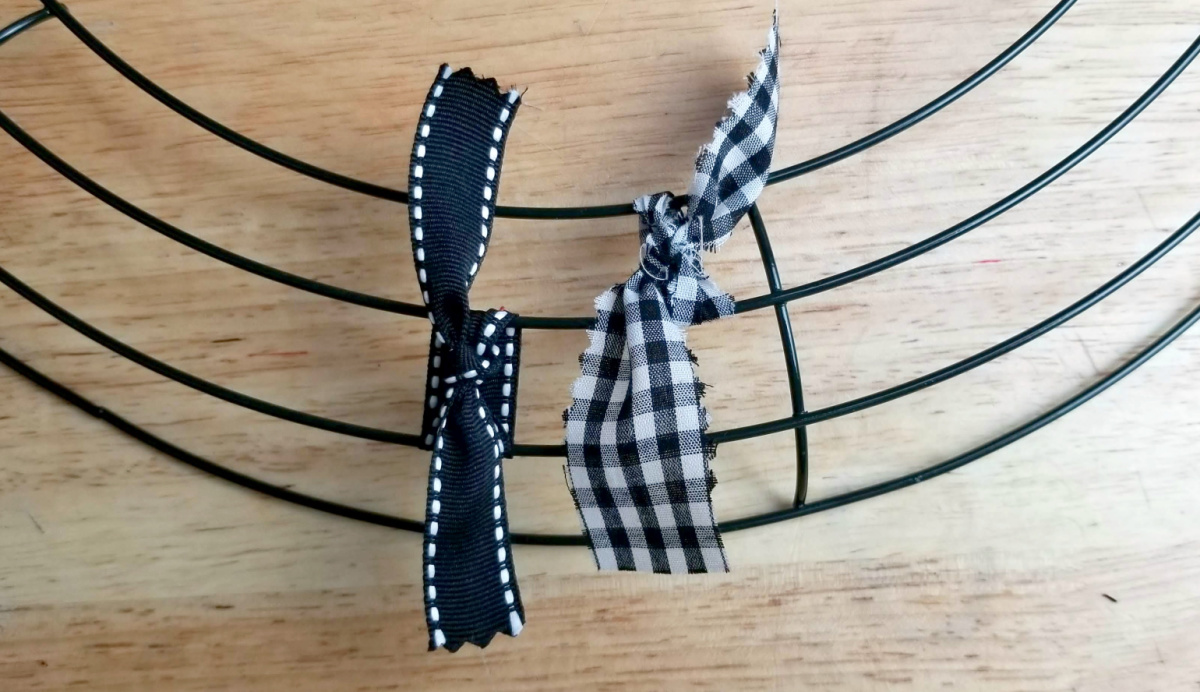
Step 4: Next, take a piece of white ribbon and knot around the 2nd and 3rd rings of the wreath form.
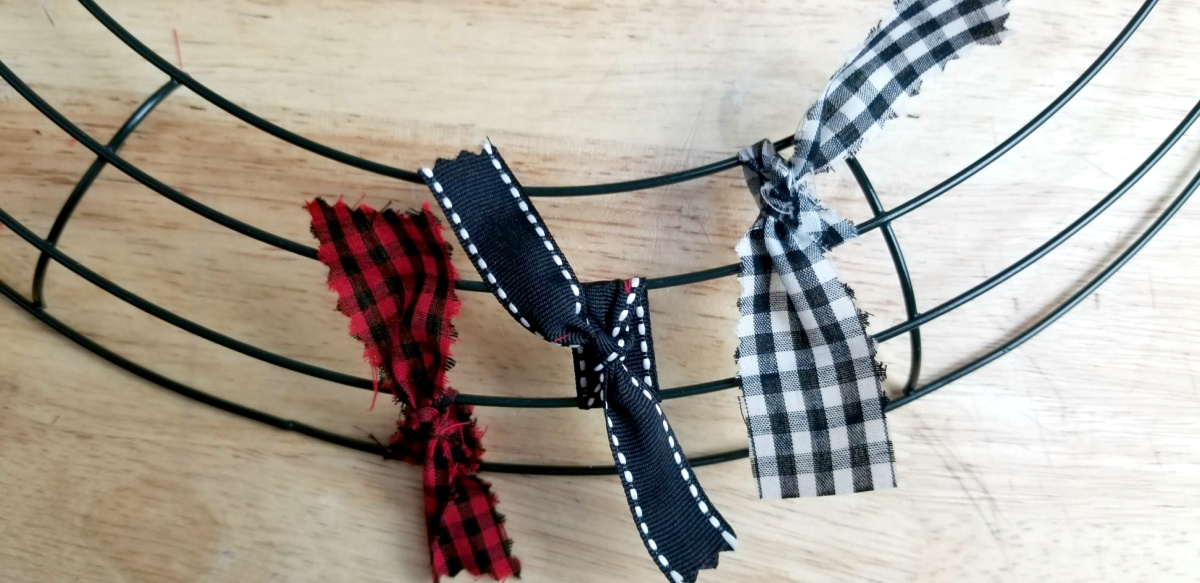
Step 5: Now take a piece of the white checked fabric and knot around the 3rd and 4th rings of the wreath.
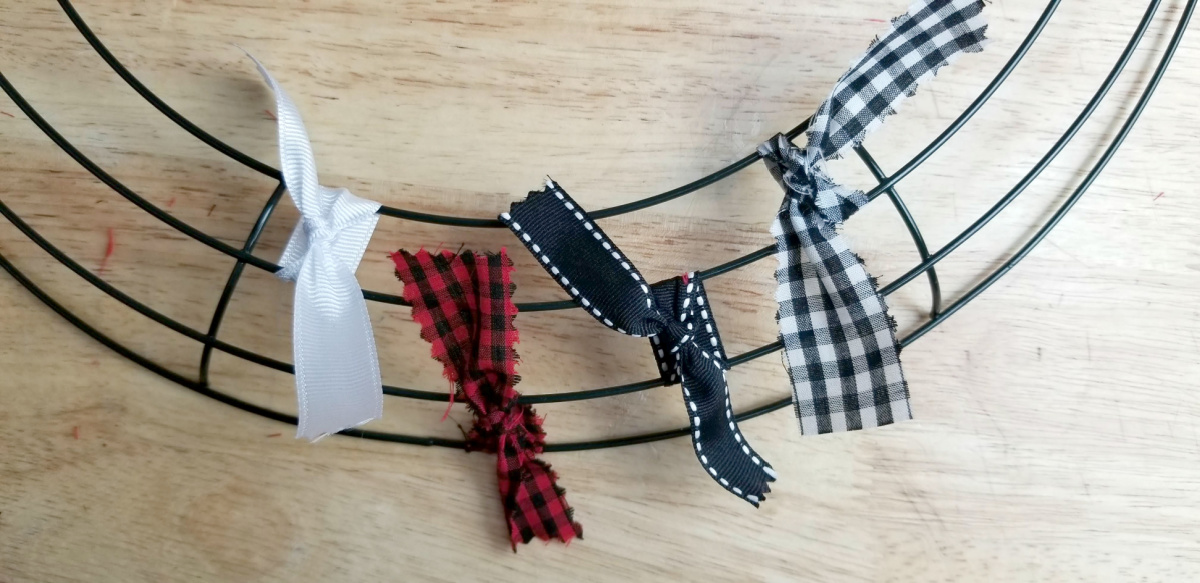
Step 6: Take the next color/pattern of ribbon and tie around the 1st and 2nd rings of the wreath.
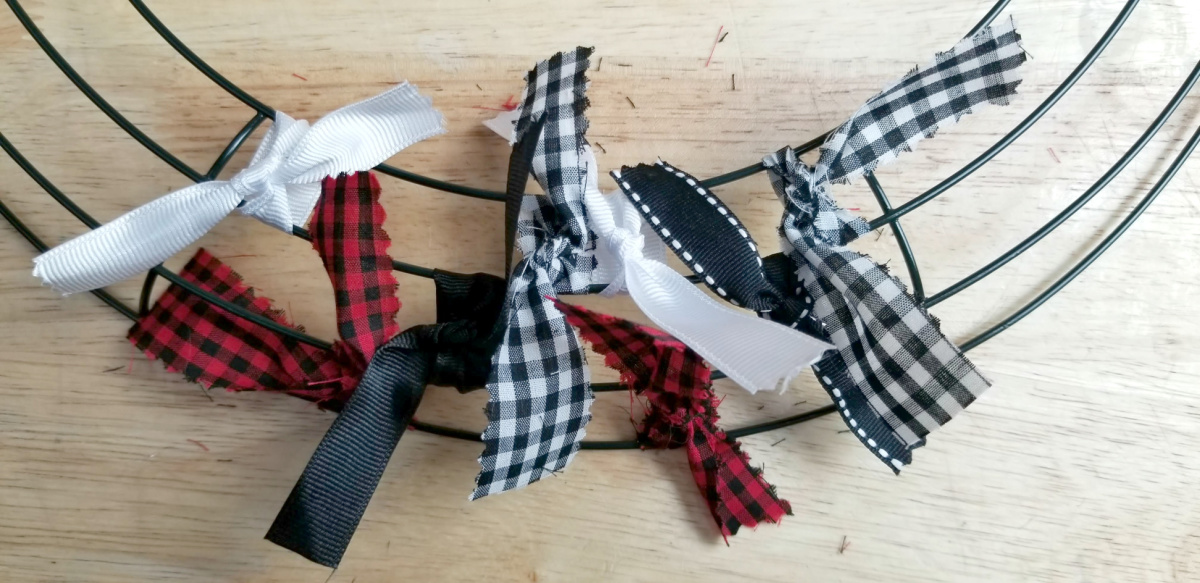
Step 7: Repeat steps 3-6 until the wreath is full.
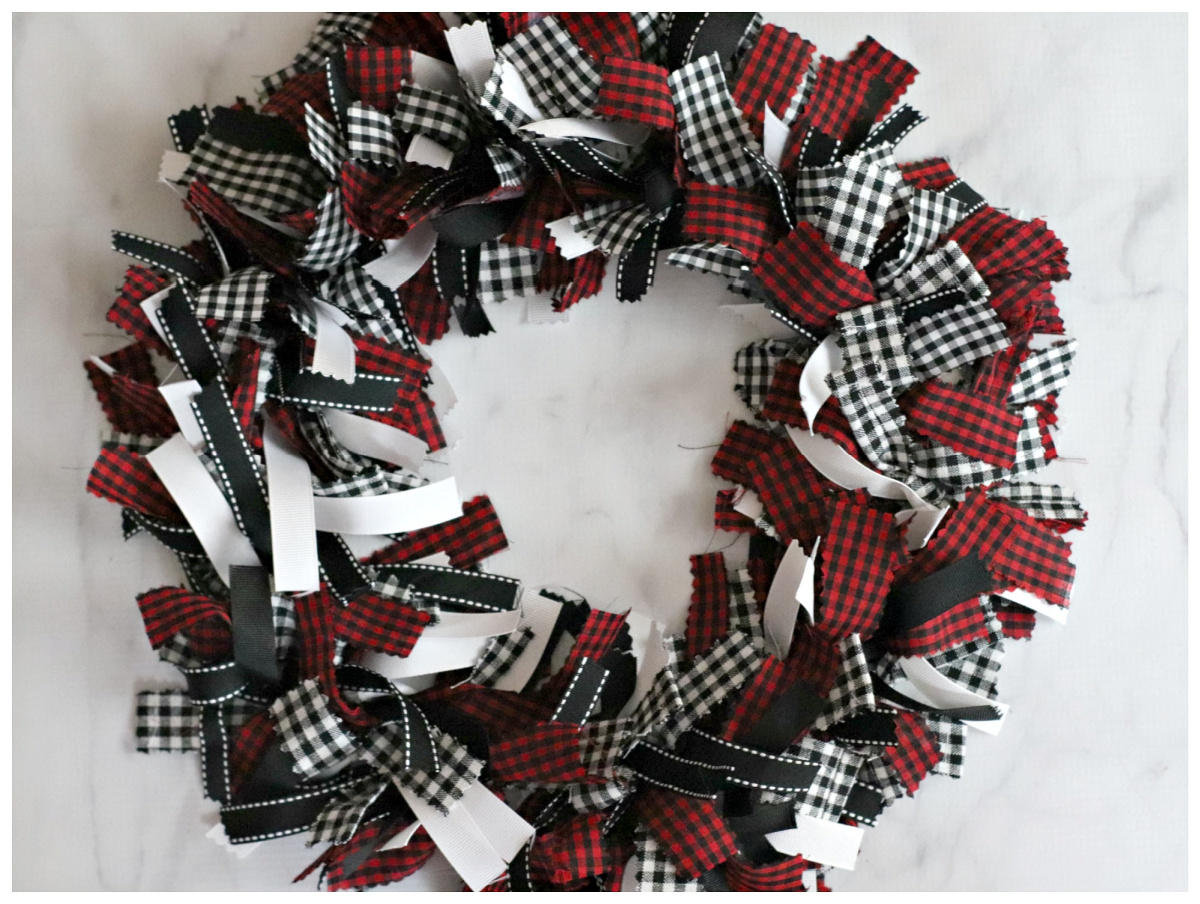
An Easy Wreath Blending Old and New
And there you have it. See? I told you this DIY buffalo plaid wreath wasn’t hard to make. It’s a great addition to your holiday or rustic decor that gives you all the old school vibes you love with a modern twist thanks to the bold black woven into the design. With just a few supplies, you can make this wreath and add a bit of whimsy and a dash of boldness to your home just in time for the holidays. And because it’s got that timeless look, you can add your complete wreath to your home and enjoy its rustic farmhouse chic look all year long, as well!