How Was Your Day?

Upscale Ideas for a Conscious Casual Life

  • Home
  • Beauty & Fashion
    • Beauty
    • Fashion
  • DIY
  • Home & Garden
    • Home Decor
    • Gardening
    • Organizing
  • Food
  • Travel
  • Love & Money
    • Love
    • Money
  • 2022 Holiday Gift Guides
  • About How Was Your Day
  • Disclosure/Privacy Policy
  • Media PR Kit
  • Favorite Things
You are here: Home / Crafts / DIY Farmhouse Stacking Tray Tutorial

DIY Farmhouse Stacking Tray Tutorial

August 2, 2022 By Greta Brinkley

Sharing is caring!

0 shares
  • Share
  • Tweet

The Farmhouse or Rustic Industrial look is still going strong and is showing no plans of slowing down anytime soon, thanks to Chip and Joanna Gaines. One good thing about the aesthetic is that it’s easy to do some DIY projects that fit right in to your decor.

Even better, these projects, like this DIY Farmhouse Stacking Tray, or the Shabby Farmhouse Two Tiered Tray are simple and inexpensive to do.  Plus, they add some much needed storage to your home. Now, that’s what I call a win.

The items for this project all came from Dollar Tree. But, you can find small drawers all over with just a little looking. Our local Habitat for Humanity location always has a ton of extra drawers in small through giant sizes.

Links may be commissioned.
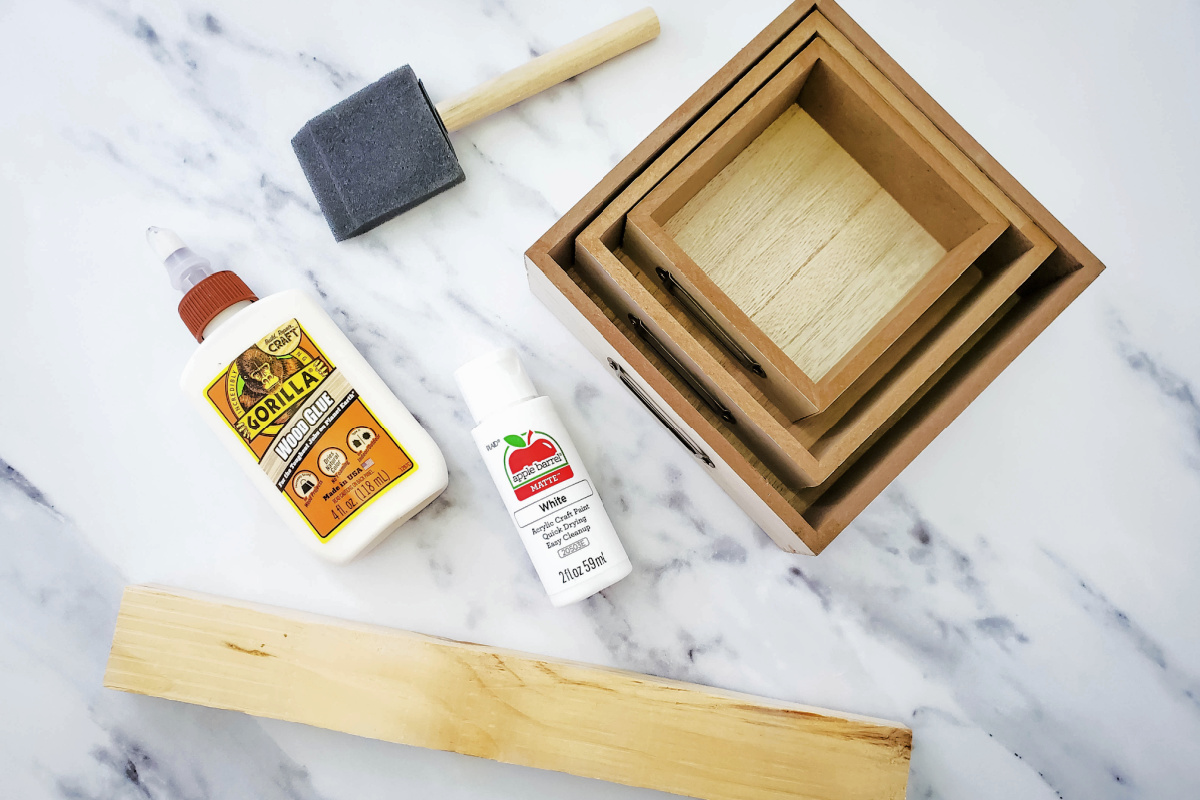
Supplies:

  • 3 sizes of wooden decorative boxes. These came from Dollar Tree
  • 12” chunky slat from Dollar Tree. A scrap piece of 1×2 wood would work, too.
  • Wood glue
  • White paint
  • Foam brush


Directions:

1. Cut the chunky slat in half widthwise using a saw. You should have two pieces that are each 6-ish inches in length.

2. Apply wood glue to the short end end of one of the cut pieces of chunky slat. Set it in the middle of the inside of the largest decorative box, and hold for a minute to help secure it. 

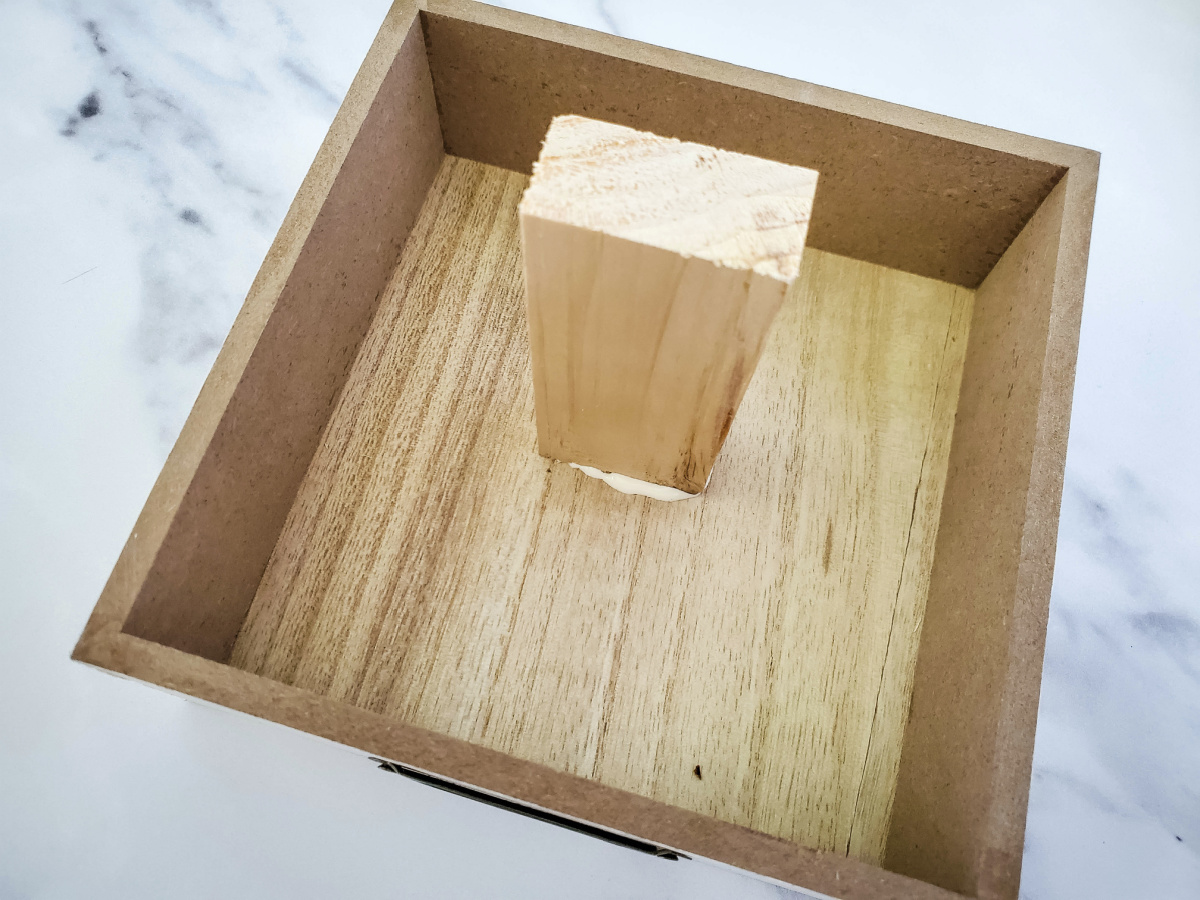
3. Apply glue to the top of the chunky slat that you just glued down. Center the middle size decorative box on top of the chunky slat. Gently press down to allow the glue to bind.

4. Apply glue to one end of the remaining piece of chunky slat. Set it in the middle of the inside of the medium sized decorative box, and hold for a minute to secure it.

5. Apply glue to the top of the chunky slat that you just glued down. Center the smallest decorative box on top of the chunky slat. Gently press down to allow the glue to bind.

6. Allow to glue to set and bid everything together overnight.

7. Squeeze some white paint out of the bottle onto a paper plate. Dip the very tip of the foam brush into the paint, and lightly apply paint over the entire structure. You do not want a thick coat of paint. You want to use more of a dry brush technique and make sure to paint it lightly, for the white washed effect.

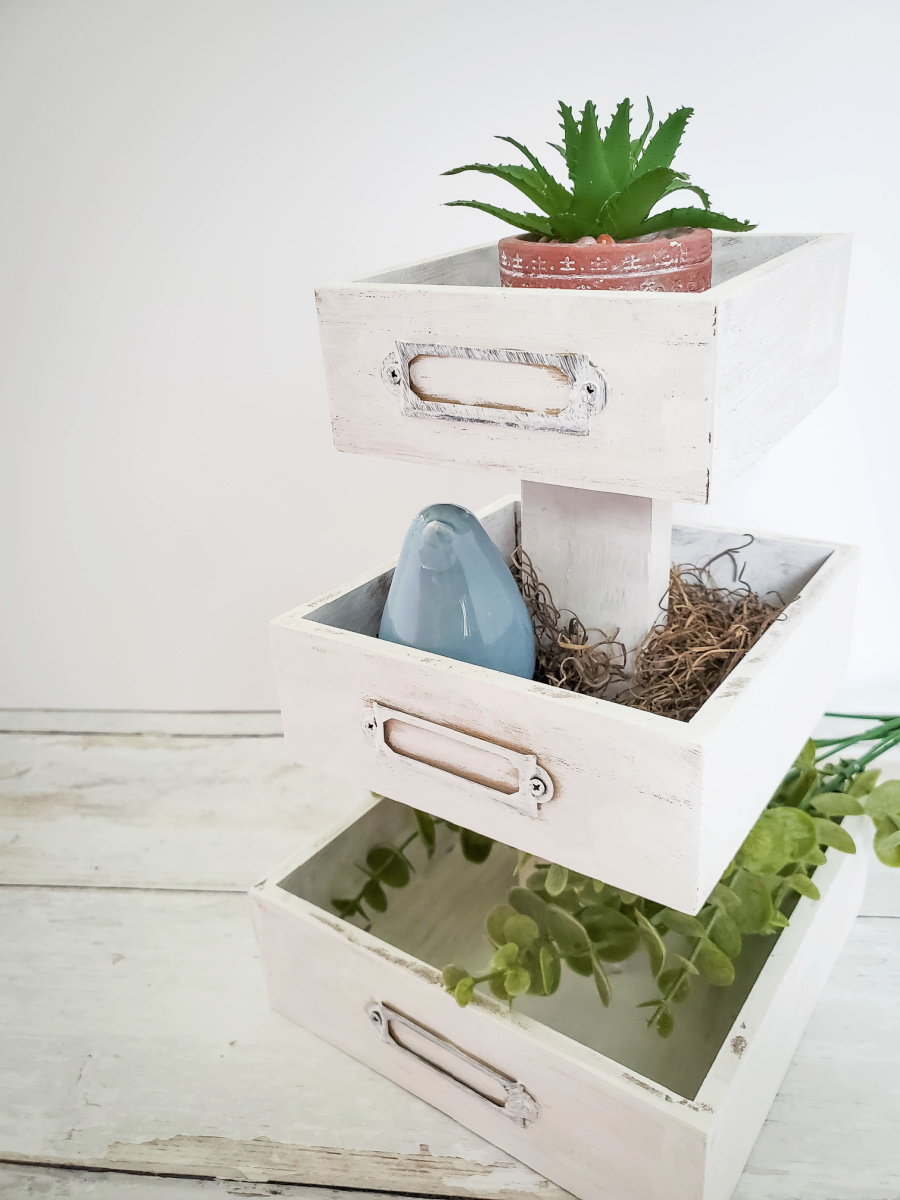
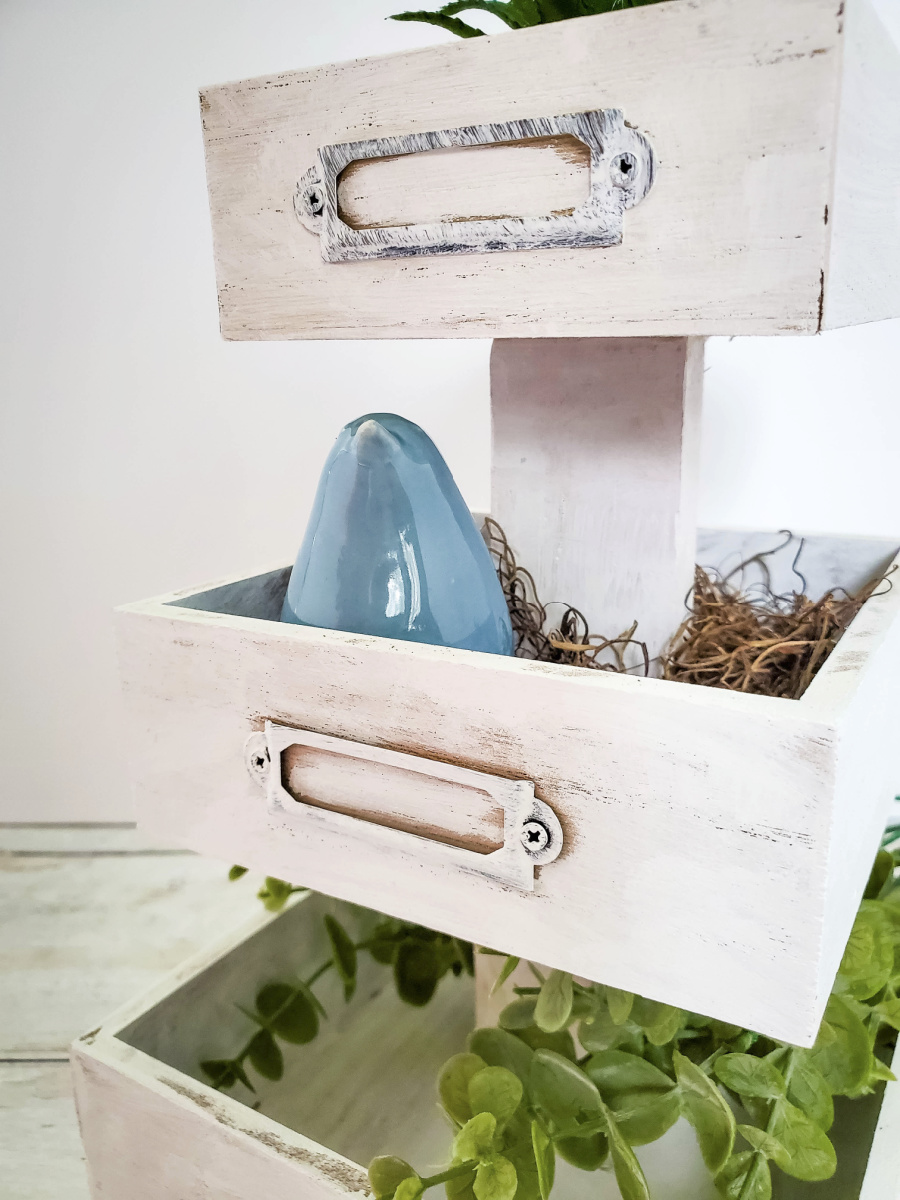
8. Allow paint to dry, then fill the boxes with decorations.


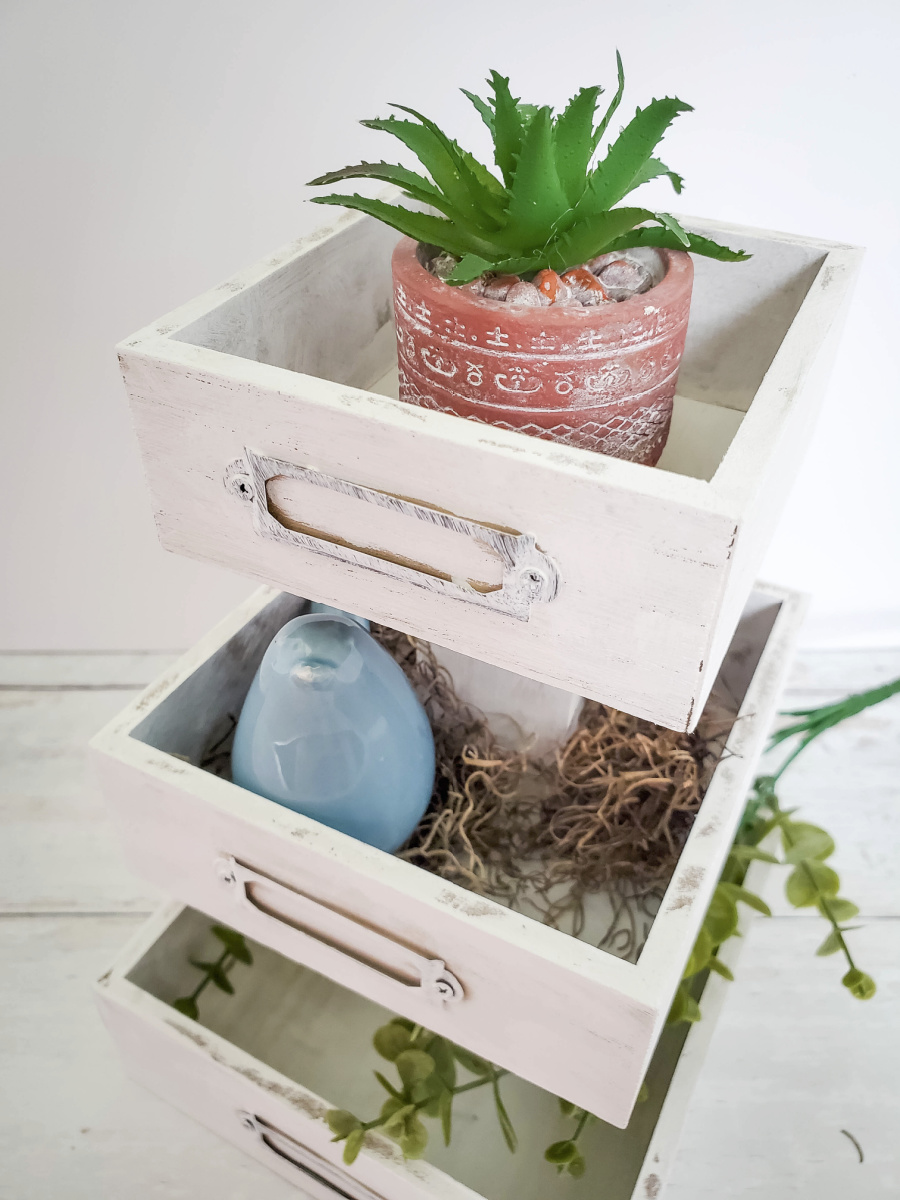
See how easy this is to make?And it really adds a lot of oomph to your room. This would be great in a bedroom to keep those things like your lip balms, lotions, phone, tissues, and other random items that end up looking like clutter.

Share this:

  • Click to print (Opens in new window)
  • Click to share on Facebook (Opens in new window)
  • Click to share on Twitter (Opens in new window)
  • Click to share on Pinterest (Opens in new window)
  • Click to share on LinkedIn (Opens in new window)
  • Click to share on Reddit (Opens in new window)
  • Click to share on Tumblr (Opens in new window)

Related

Filed Under: Crafts

About Greta Brinkley

Greta is originally from the West Coast. Now living in the Midwest, she loves hockey, sparkles, nail polish, and bright colors. She also cannot resist anything that has peanut butter and chocolate together. And she hates filling out bios. Yep.

« Customized Gift Ideas For a Practical and Personal Touch
19 Perfect Summer Cocktails that You’ll Definitely Want to Try »
  • Email
  • Facebook
  • Instagram
  • Pinterest
  • Twitter

About Me

Hi! I’m Greta, a Lifestyle and DIY expert. I’m originally from the west coast, and currently living in the Midwest. We’re mad about DIY and travel, lover of fashion and food, and slightly obsessed with trivia. And you can never go wrong with glitter, nail polish or hockey. Did I mention we were named one of the top DIY blogs?

"Want to work together, or just say hi? Drop me a line! WhyHelloGreta@gmail.com
2023 Holiday Gift Guide graphic
Be Part of our 2023 Holiday Gift Guide

As Seen On

Our Most Popular Posts

20 More Must Have Camping Essentials

How to Make Glitter Wine Glasses

Easy 10 Minute Hair Updo Tutorial

Custom Mudroom bench Ikea Hack

A Trip on the Grand Canyon Railroad

  • Email
  • Facebook
  • Instagram
  • Pinterest
  • Twitter
  • YouTube

I am a participant in the Amazon Services LLC Associates Program, an affiliate advertising program designed to provide a means for me to earn fees by linking to Amazon.com and affiliated sites.

Newsletter

subscribe for email updates!

Copyright © 2023 · Foodie Pro Theme on Genesis Framework · WordPress · Log in

0 shares
 

Loading Comments...