Special thanks to Martha Stewart and Cricut for sponsoring this Sparkle Advent Calendar project.
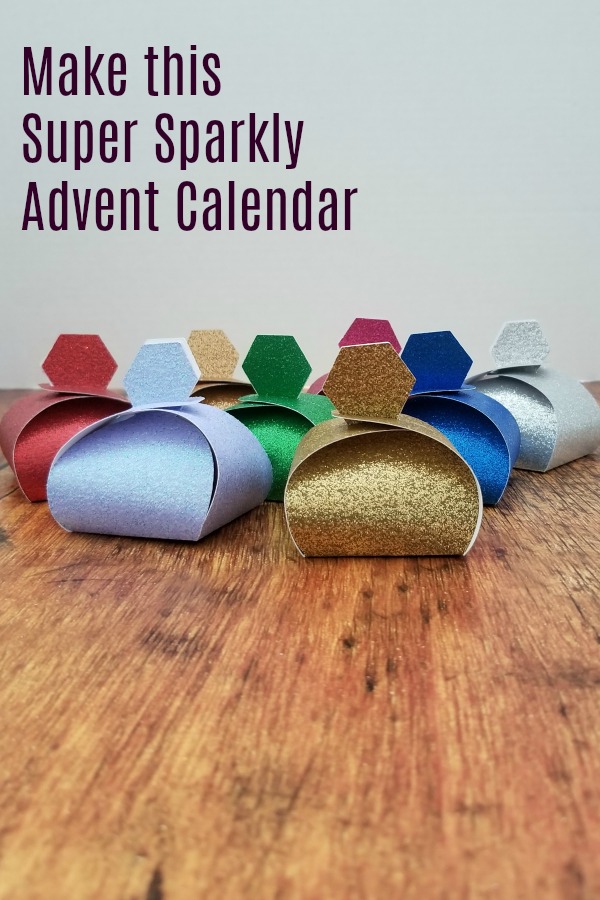
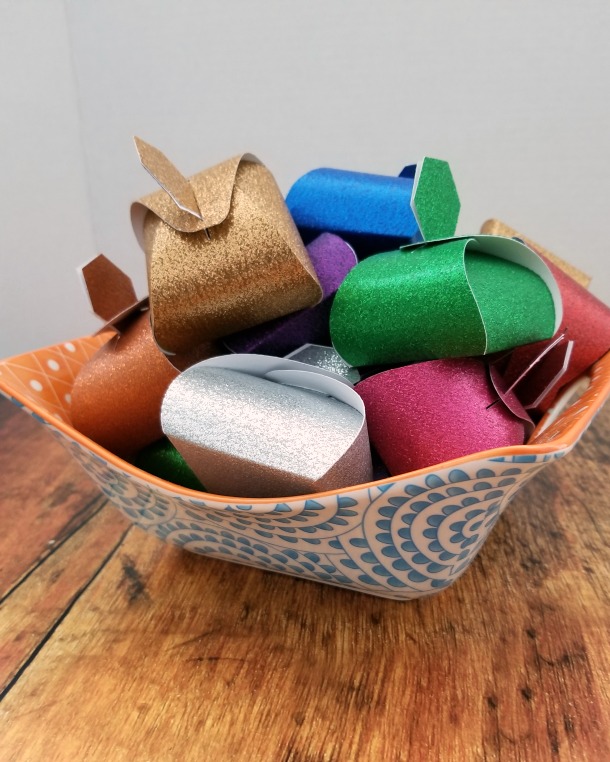
One of my favorite parts of Christmas is the Advent calendar. I’ve always loved opening the little boxes, windows, or doors and finding the small secret that lies behind. Sometimes it’s a trinket, while other times it’s a coupon for something small or a piece of candy. We’re making our own Advent Calendar with these adorable boxes we cut on the Cricut Explore Air 2.
About the Martha Stewart Cricut Explore Air 2
Links may be commissioned.
Recently, Martha Stewart and Cricut announced a partnership, which saw Martha Stewart designing projects, files, and machines for Cricut. I was lucky enough to get one of the Martha Stewart Explore Air 2 machines. I have an older generation Explore, and I did not enjoy using it.
The new Explore Air 2 is such a change that it has quickly become one of my favorite crafting tools ever. The redesign almost makes cutting your projects fool-proof. It’s easy to change the material you’re cutting without having to manually adjust the blade every time. And if you’re doing multiples of a project, like for this glitter advent calendar, you can just set your number and it will help arrange the files for the best cuts.
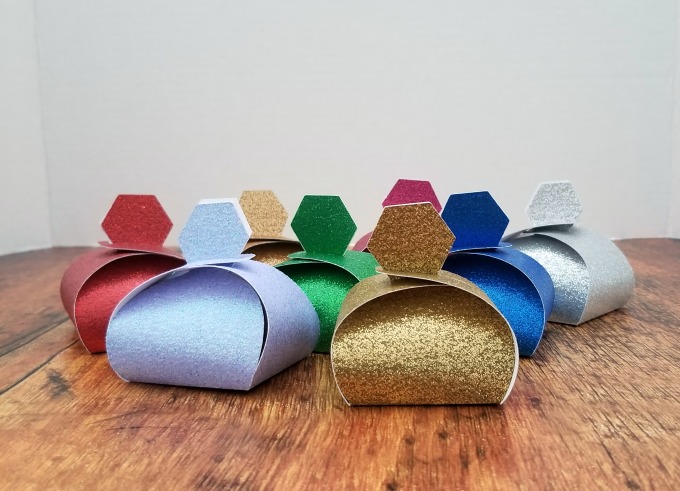
The Martha Stewart edition comes with 25 projects that have been designed by Martha Stewart especially for Cricut. In addition to that, there are several hundred MS cut files that you have access to. And they’re always adding new things. We used the box to create this Sparkle Advent Calendar.
How to Make a Sparkle Advent Calendar
Supplies
- Glitter Card Stock – The sparkle makes this look so pretty and festive.
- Candy, small trinkets, little gifts – to place inside the boxes.
- Cricut Explore Air 2
- Scoring Stylus (optional but helps.)
- Martha Stewart Bee Favor box (file #M570EE99)
- Scissors
- Light Grip Mats
Directions
The first step was shrinking the box down a touch. Our paper was 8 ½ x 11, and the box was designed to cut on a 12 x 12 sheet. This made the finished box about ¾ inch smaller, but it was really a great size for our project.
Next, we did a test cut. Always always always do a test run of your project before you start on “the good stuff.” This will allow you to make sure that the sizing is correct, and the design is really what you want. I needed to make another small adjustment to shrink the project just a little more.
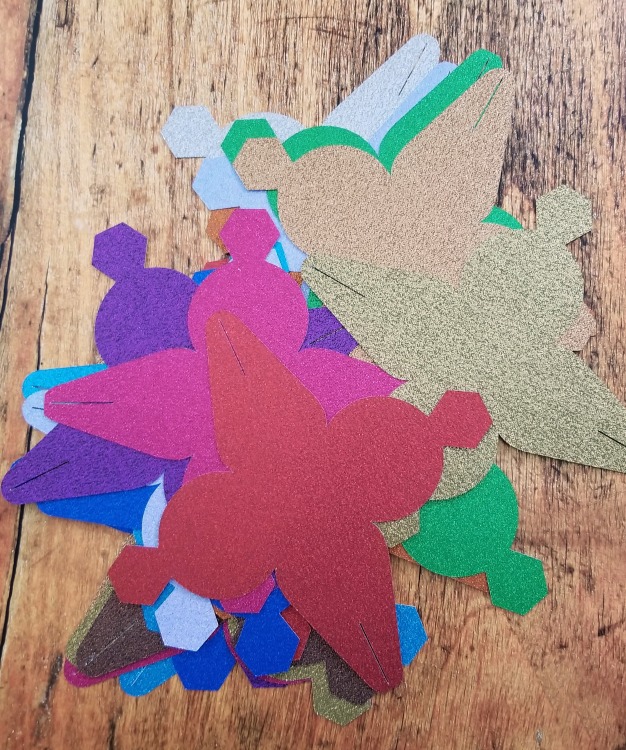
Finally, we were ready to cut. This is a very easy project, just a long one. Especially since you’re cutting 24 boxes. We prepared a few mats with our glitter papers, assembly line style. And started cutting. One of the beauties of having multiple mats prepared, is that you don’t have to stop between each cut. When one is done, you remove it from the machine and start on the next. While that one is cutting, you can remove your project from the mat, and prepare the mat for your next cut.
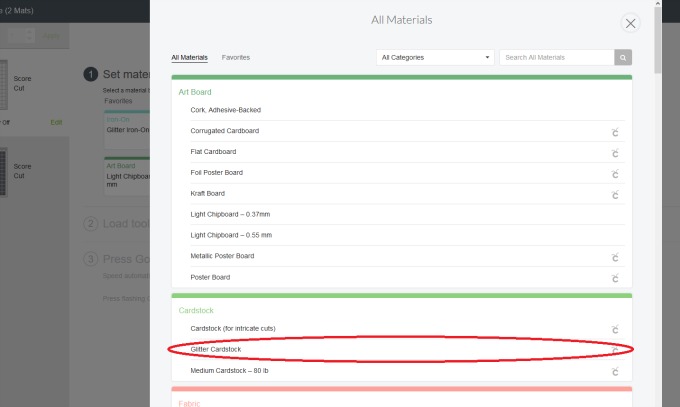
The Cricut Explore Air 2 is great, because it has a ton of materials and their cutting requirements pre-programmed. You just turn the dial to your desired material. Since I’m using glitter cardstock, I turned the dial to custom, and then selected glitter cardstock in Design Space.
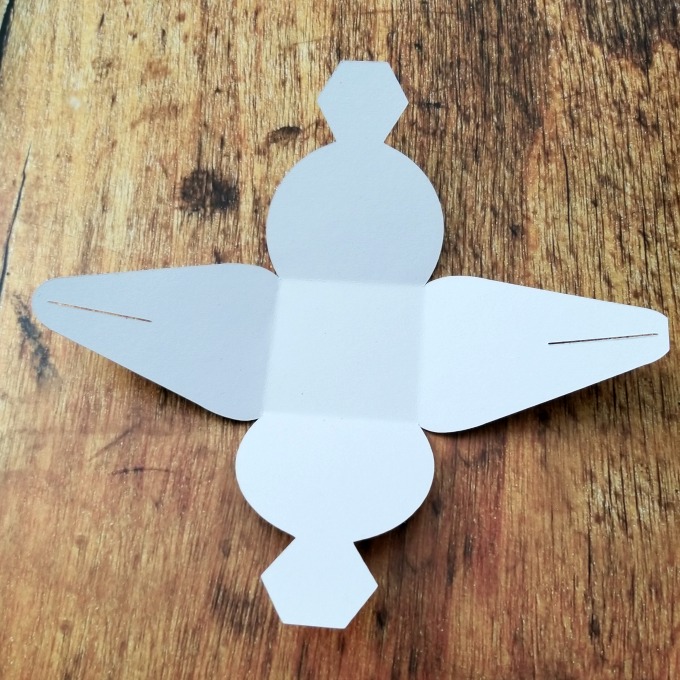
Once all 24 boxes were cut, I started folding. This is an easy project to fold, since the base and sides are so distinct. I like to work in an assembly line fashion, so I pre-fold all sides, then set them to the side while they’re still flat. You can do it where you complete each box before moving to the next one. It’s totally up to you!
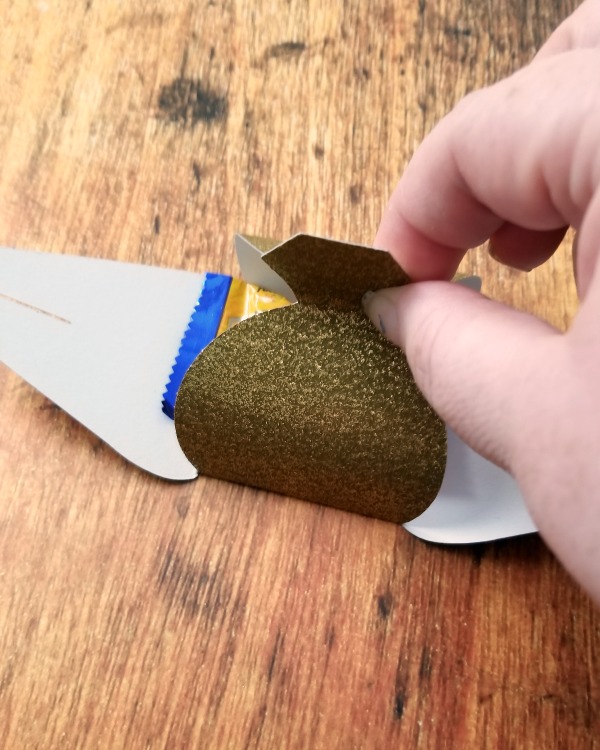
Once the boxes are pre-folded, I grab the assortment of trinkets, candy, coupons, and whatever other goodies I can come up with. I place one in the center, then fold up the sides. I grab the top tabs, and make sure that the rounded sides are bowed out by pushing down a little, to create a nice shape. If you don’t do this, one side might get sucked in. It’s not the end of the world, but it doesn’t look as pretty.
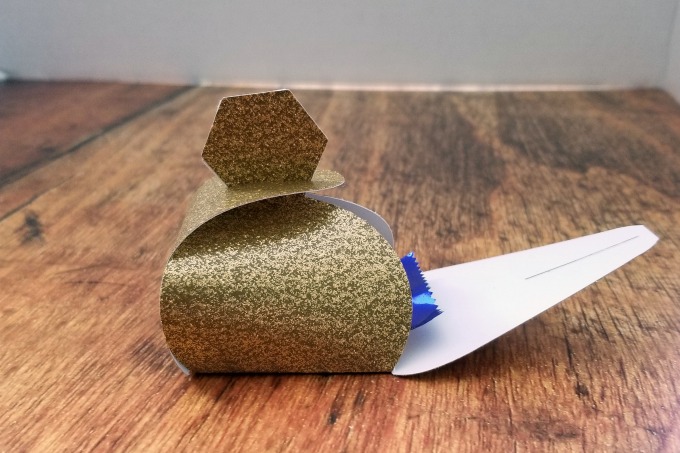
Fold one slot side over and push the tabs through the slot. Repeat with the other side. Now repeat for the other 23 boxes! Ta-daaa! You now have a really great advent calendar that’s sophisticated enough for adults, but cute enough for kids.

This sounds like a lot of work, but it took less than an hour and a half, from start to finish, and I spent a lot of that time catching up on my internet reading and tv watching.

Like this Advent Calendar project? Don’t forget to share! Or pin it to save it for later!