How Was Your Day?

Upscale Ideas for a Conscious Casual Life

  • Home
  • Beauty & Fashion
    • Beauty
    • Fashion
  • DIY
  • Home & Garden
    • Home Decor
    • Gardening
    • Organizing
  • Food
  • Travel
  • Love & Money
    • Love
    • Money
  • 2022 Holiday Gift Guides
  • About How Was Your Day
  • Disclosure/Privacy Policy
  • Media PR Kit
  • Favorite Things
You are here: Home / Home & Garden / Gardening / How to Create a Lucky Mini Terrarium that Fits Anywhere

How to Create a Lucky Mini Terrarium that Fits Anywhere

February 15, 2017 By Greta Brinkley

Sharing is caring!

248 shares
  • Share
  • Tweet

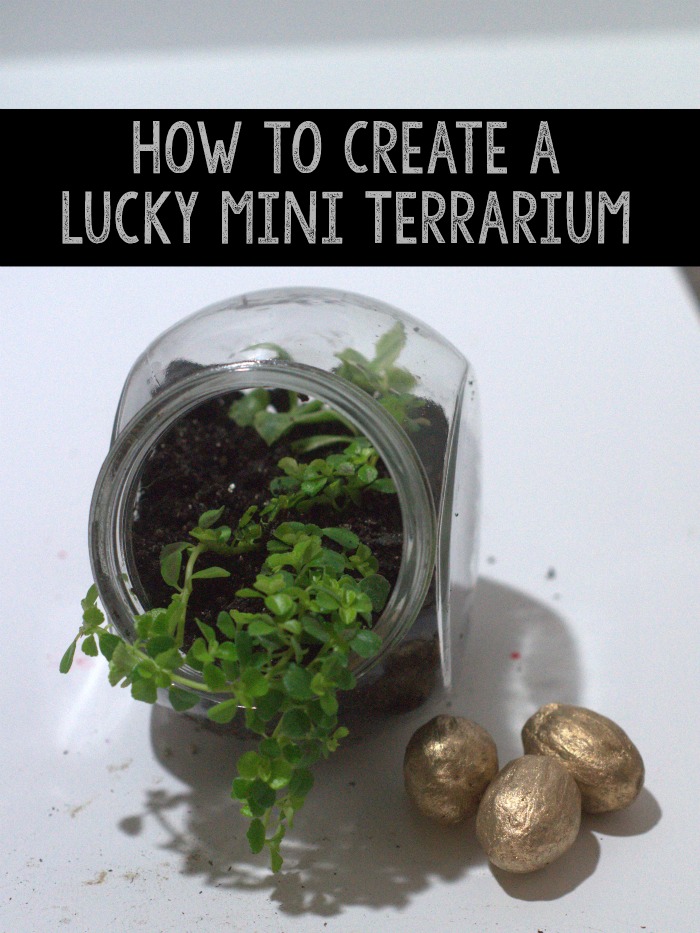
My mom is mad about houseplants. One of the things that she’s always done was repurpose unusual containers to create interest in her houseplant collections, and create terrariums. I’ve made a bajillion terrariums, and realized I’d never shared one. So, we’re making a great mini terrarium that allows you to grow your own four leaf clover.

How to make a lucky miini terrarium

I’ve mentioned a few times here that my parents are hippies.  Like, full on back to the land movement built their own house with their own hands hippies. This helps to explain my mom’s love of houseplants.

How to Create a Lucky Mini Terrarium

Making a DIY Mini Terrarium is easy.  You need just a few items, and about 10 minutes.  Links may be affiliate links

Supplies to make a mini terrarium

Terrarium Supplies Needed

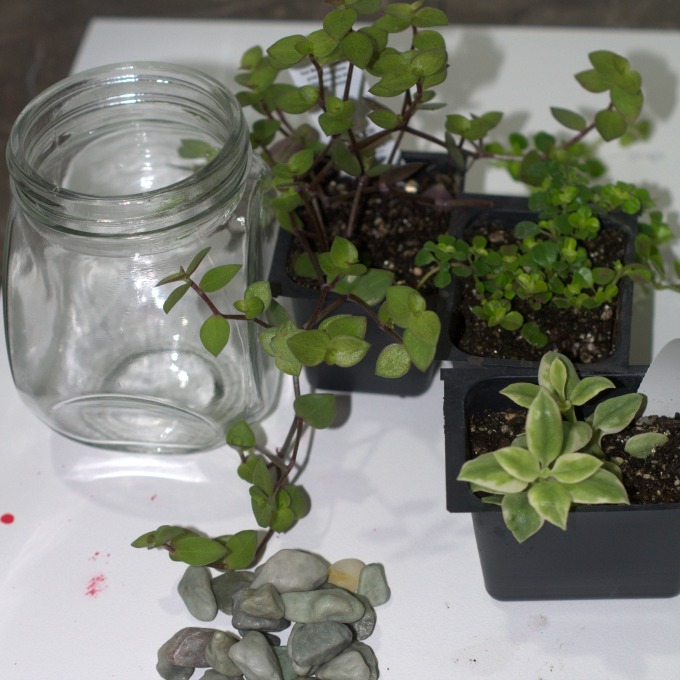
  • A small jar. I’m using this jar that I found at Dollar Tree.
  • Gravel
  • Soil
  • Small Plants
  • Spoon
  • Scissor or pruning shears

Mini Terrarium Directions

Take a trip to your local nursery, and choose some healthy, but small plants for your mini terrarium.  The plants I selected are in 2 inch pots, and were relatively inexpensive.

Water your plants. Let the soil really absorb the water.  Doing this a few hours to a day before you want to build your terrarium is perfect.

Wash your jar in warm soapy water, and dry well. This gets rid of whatever may be on your jar, and any grease or residue from the manufacturing process.

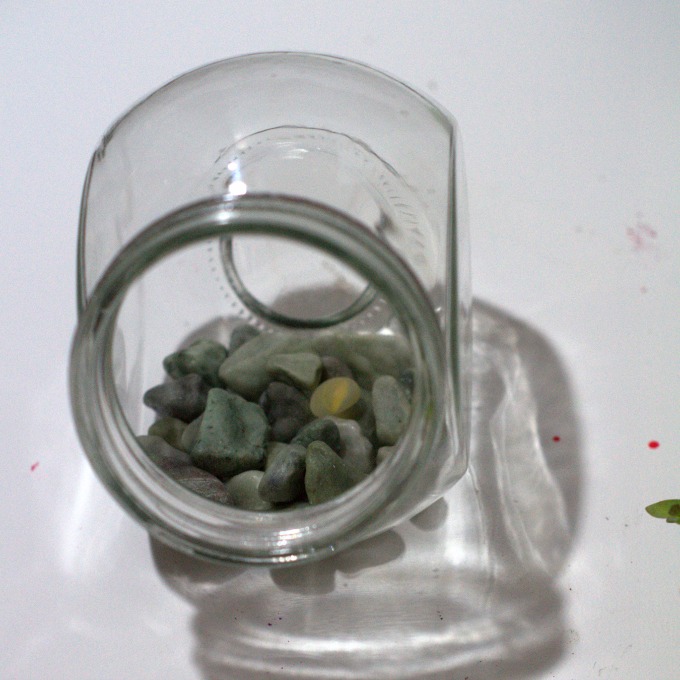
Add a shallow layer of gravel to the bottom of your jar. We need this for drainage.

Add a good quality potting soil on top of the gravel.

First plant in the mini terrarium

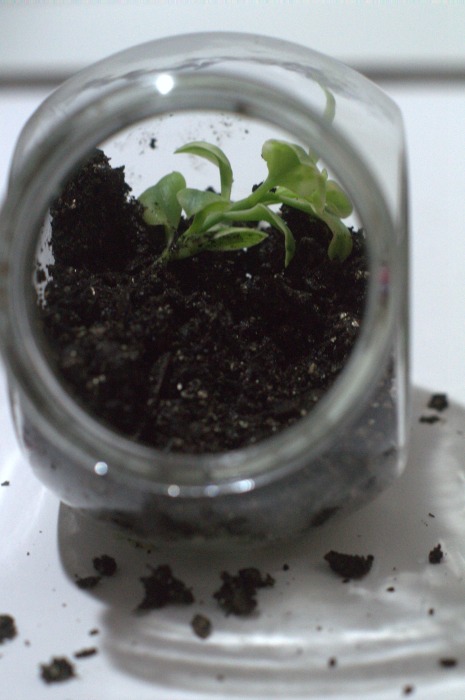
Place the first plant towards the back of the jar, adding soil around it as needed. Pack down gently, but firmly. I use a spoon to fill in the potting soil, and a pencil, knife, or chopstick to move the plant.

Trailing plant in a terrarium

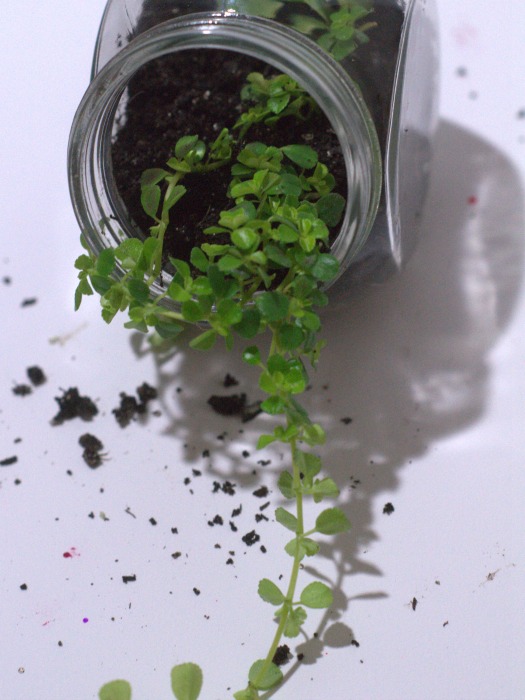
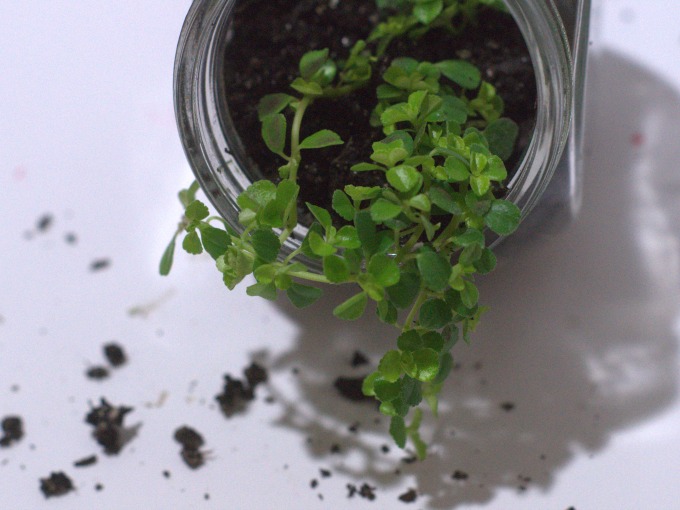
Add the second plant towards the front of the jar. In this case, we’re using a trailing plant and letting it spill out of the opening in the jar.

Trim the plant as needed.  You can use pruning shears, but I just used scissors.  These plants are young and tender, so you really could just pinch the extra length off with your fingers.

Trailing plant trimmed in terrarium

Press the soil down firmly, but not compacting it too tightly. The back of the spoon comes in handy for this step.

Water your plants lightly. We just want the soil to be slightly damp.

How to make a lucky miini terrarium

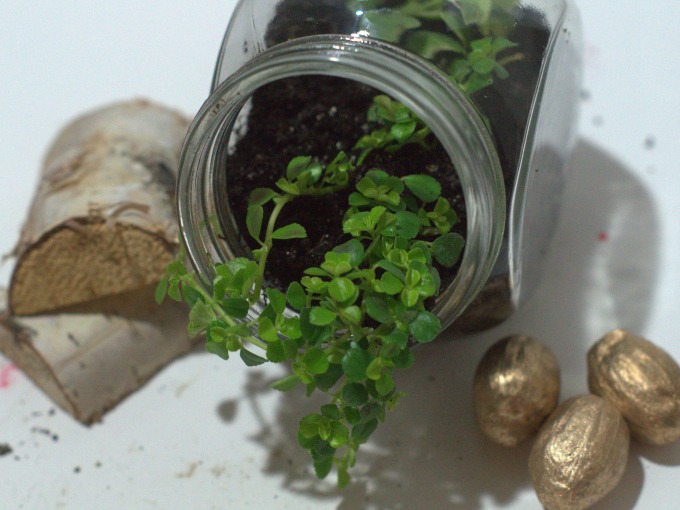
Voila!  You’ve created a great terrarium that’s not too large to go anywhere. It can even sit on your desk.


Be sure to press your luck, and see all the other fab St Patrick’s Day projects


  • Rainbow Bobby Pins – Style on Main
  • Pot of Gold Crochet Cup Cozy – Busy Creating Memories
  • St Patrick’s Day Printable Cupcake Toppers – Diana Rambles
  • Shamrock Emoji Pudding Cups – Cutefetti
  • St Patrick’s Day Glass Map Necklace – Food Fun Family
  • St Patrick’s Day DIY Slime – Views from the ‘Ville
  • Easy St Patrick’s Day Centerpiece – Upstate Ramblings


How to Create a lucky Mini Terrarium. This is ideal for your office, a bedroom shelf, or a bookshelf in a cluster.

Share this:

  • Click to print (Opens in new window)
  • Click to share on Facebook (Opens in new window)
  • Click to share on Twitter (Opens in new window)
  • Click to share on Pinterest (Opens in new window)
  • Click to share on LinkedIn (Opens in new window)
  • Click to share on Reddit (Opens in new window)
  • Click to share on Tumblr (Opens in new window)

Related

Filed Under: Gardening

About Greta Brinkley

Greta is originally from the West Coast. Now living in the Midwest, she loves hockey, sparkles, nail polish, and bright colors. She also cannot resist anything that has peanut butter and chocolate together. And she hates filling out bios. Yep.

« Fabulous Gift Ideas for the Men in Your Life
How to Make a Mexican Mule Beer Cocktail »
  • Email
  • Facebook
  • Instagram
  • Pinterest
  • Twitter

About Me

Hi! I’m Greta, a Lifestyle and DIY expert. I’m originally from the west coast, and currently living in the Midwest. We’re mad about DIY and travel, lover of fashion and food, and slightly obsessed with trivia. And you can never go wrong with glitter, nail polish or hockey. Did I mention we were named one of the top DIY blogs?

"Want to work together, or just say hi? Drop me a line! WhyHelloGreta@gmail.com
2023 Holiday Gift Guide graphic
Be Part of our 2023 Holiday Gift Guide

As Seen On

Our Most Popular Posts

20 More Must Have Camping Essentials

How to Make Glitter Wine Glasses

Easy 10 Minute Hair Updo Tutorial

Custom Mudroom bench Ikea Hack

A Trip on the Grand Canyon Railroad

  • Email
  • Facebook
  • Instagram
  • Pinterest
  • Twitter
  • YouTube

I am a participant in the Amazon Services LLC Associates Program, an affiliate advertising program designed to provide a means for me to earn fees by linking to Amazon.com and affiliated sites.

Newsletter

subscribe for email updates!

Copyright © 2023 · Foodie Pro Theme on Genesis Framework · WordPress · Log in

248 shares
 

Loading Comments...