How Was Your Day?

Upscale Ideas for a Conscious Casual Life

  • Home
  • Beauty & Fashion
    • Beauty
    • Fashion
  • DIY
  • Home & Garden
    • Home Decor
    • Gardening
    • Organizing
  • Food
  • Travel
  • Love & Money
    • Love
    • Money
  • 2019 Holiday Gift Guide
  • About How Was Your Day
  • Disclosure/Privacy Policy
  • Media PR Kit
  • Favorite Things
You are here: Home / Crafts / How To Make Your Own Stickers & Seals Tutorial

How To Make Your Own Stickers & Seals Tutorial

August 24, 2011 By Greta Brinkley

Sharing is caring!

0 shares
  • Share
  • Tweet
Have you ever wanted to know how to make your own stickers and seals?  I’m going to teach you how!
how-to-make-your-own-stickers

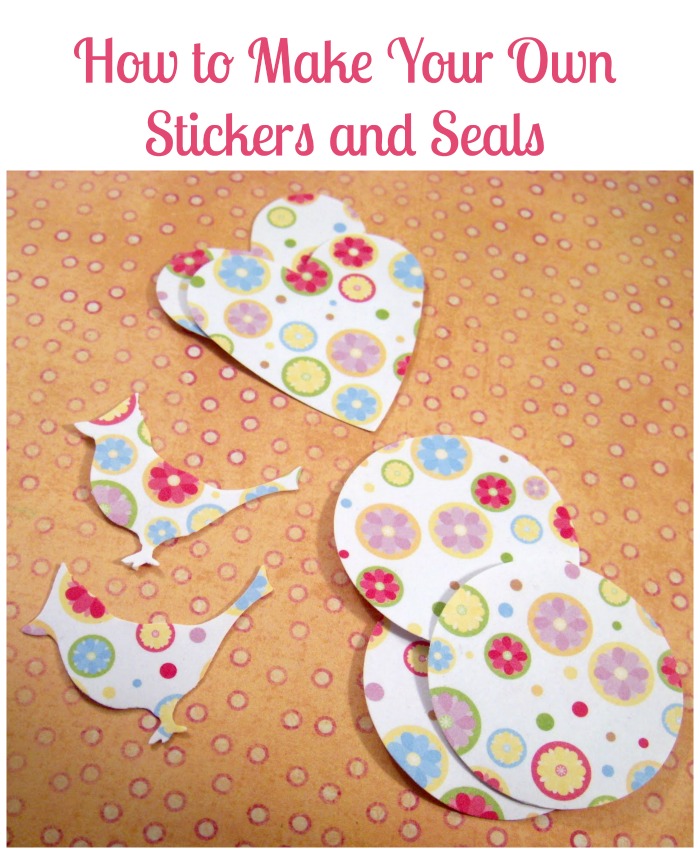
Have you seen those big, fancy stickers that people use for seals on their packages?  Have you priced them out lately?  PHWEW, talk about getting pricey!  Wanna know a secret?  They’re super-simple, and really quick to make.  I will teach you how to make your own stickers and seals.

How to Make Decorative Stickers and Seals

You’ll need the following items:

  •  Something decorative.  I’m using scrapbook paper in these pictures but have used everything from fabric to old book pages to maps.  You can even use photos!
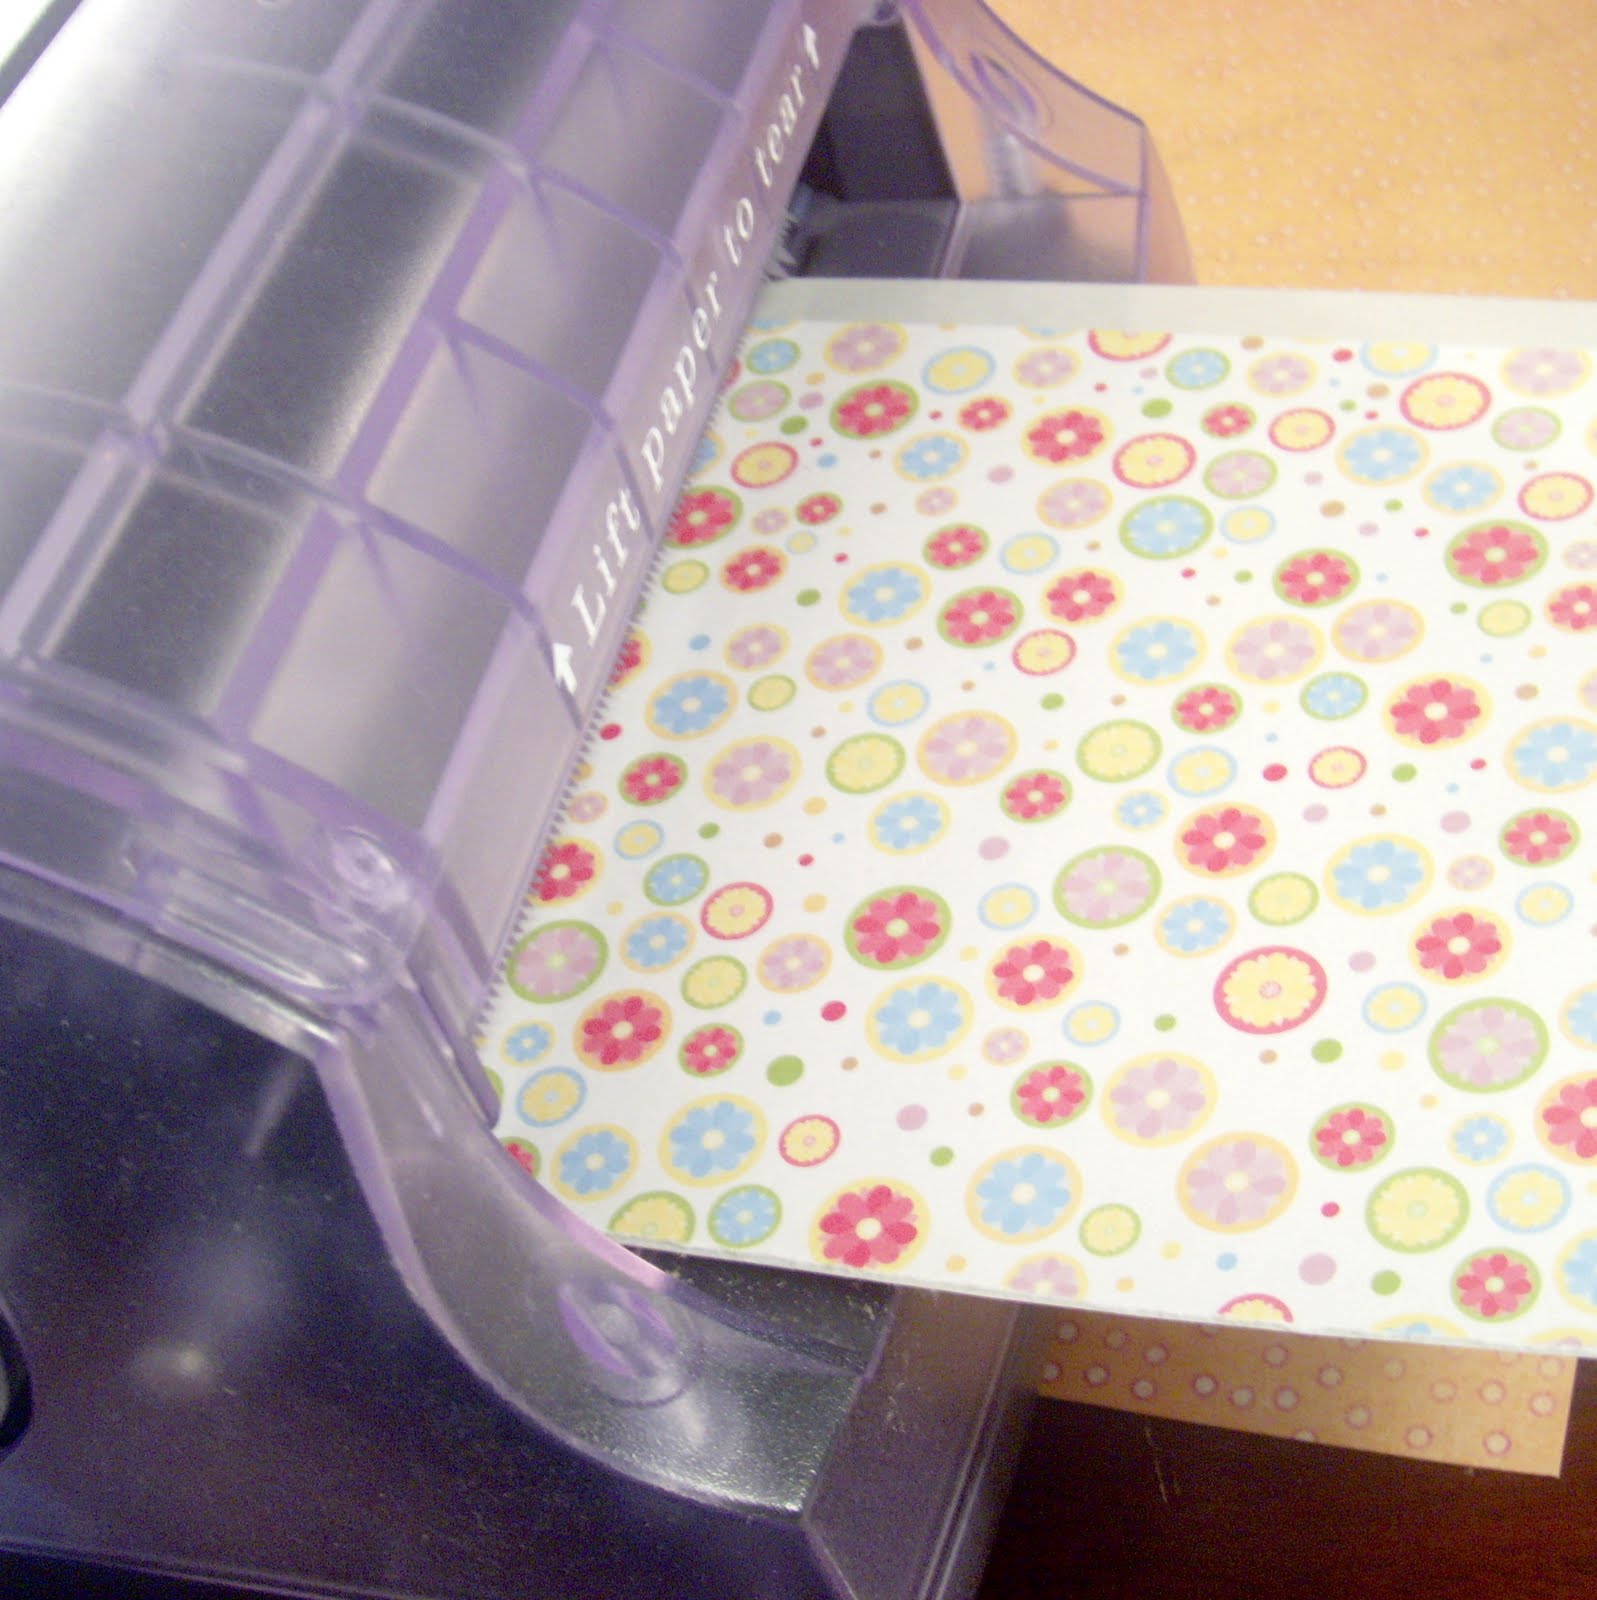
  •  A Xyron or similar.  You can use double-stick tape sheets, too.
  • Assorted decorative punches
  • Scissors

Now, to start!   Trim your paper down to size.  The xyron I’m using is 5 inches wide and my paper was 6×6.  I simply folded about 1 1/4 inches and used my fingernails to make a sharp crease so I could tear it.  If you want to be fancy, you could use a papercutter, but a smooth edge isn’t important.

Feed the paper into the xyron.  Turn the knob until the paper comes out the back.  It will now have adhesive on the back, plus a peel sheet.


Voila!  Now, choose a punch and punch out your shapes!

These are the punches I got out at the beginning of the project.  Hmmm…I think I’ll use the circle.

Line it up, then punch your shapes out.  Try to get them close without overlapping.

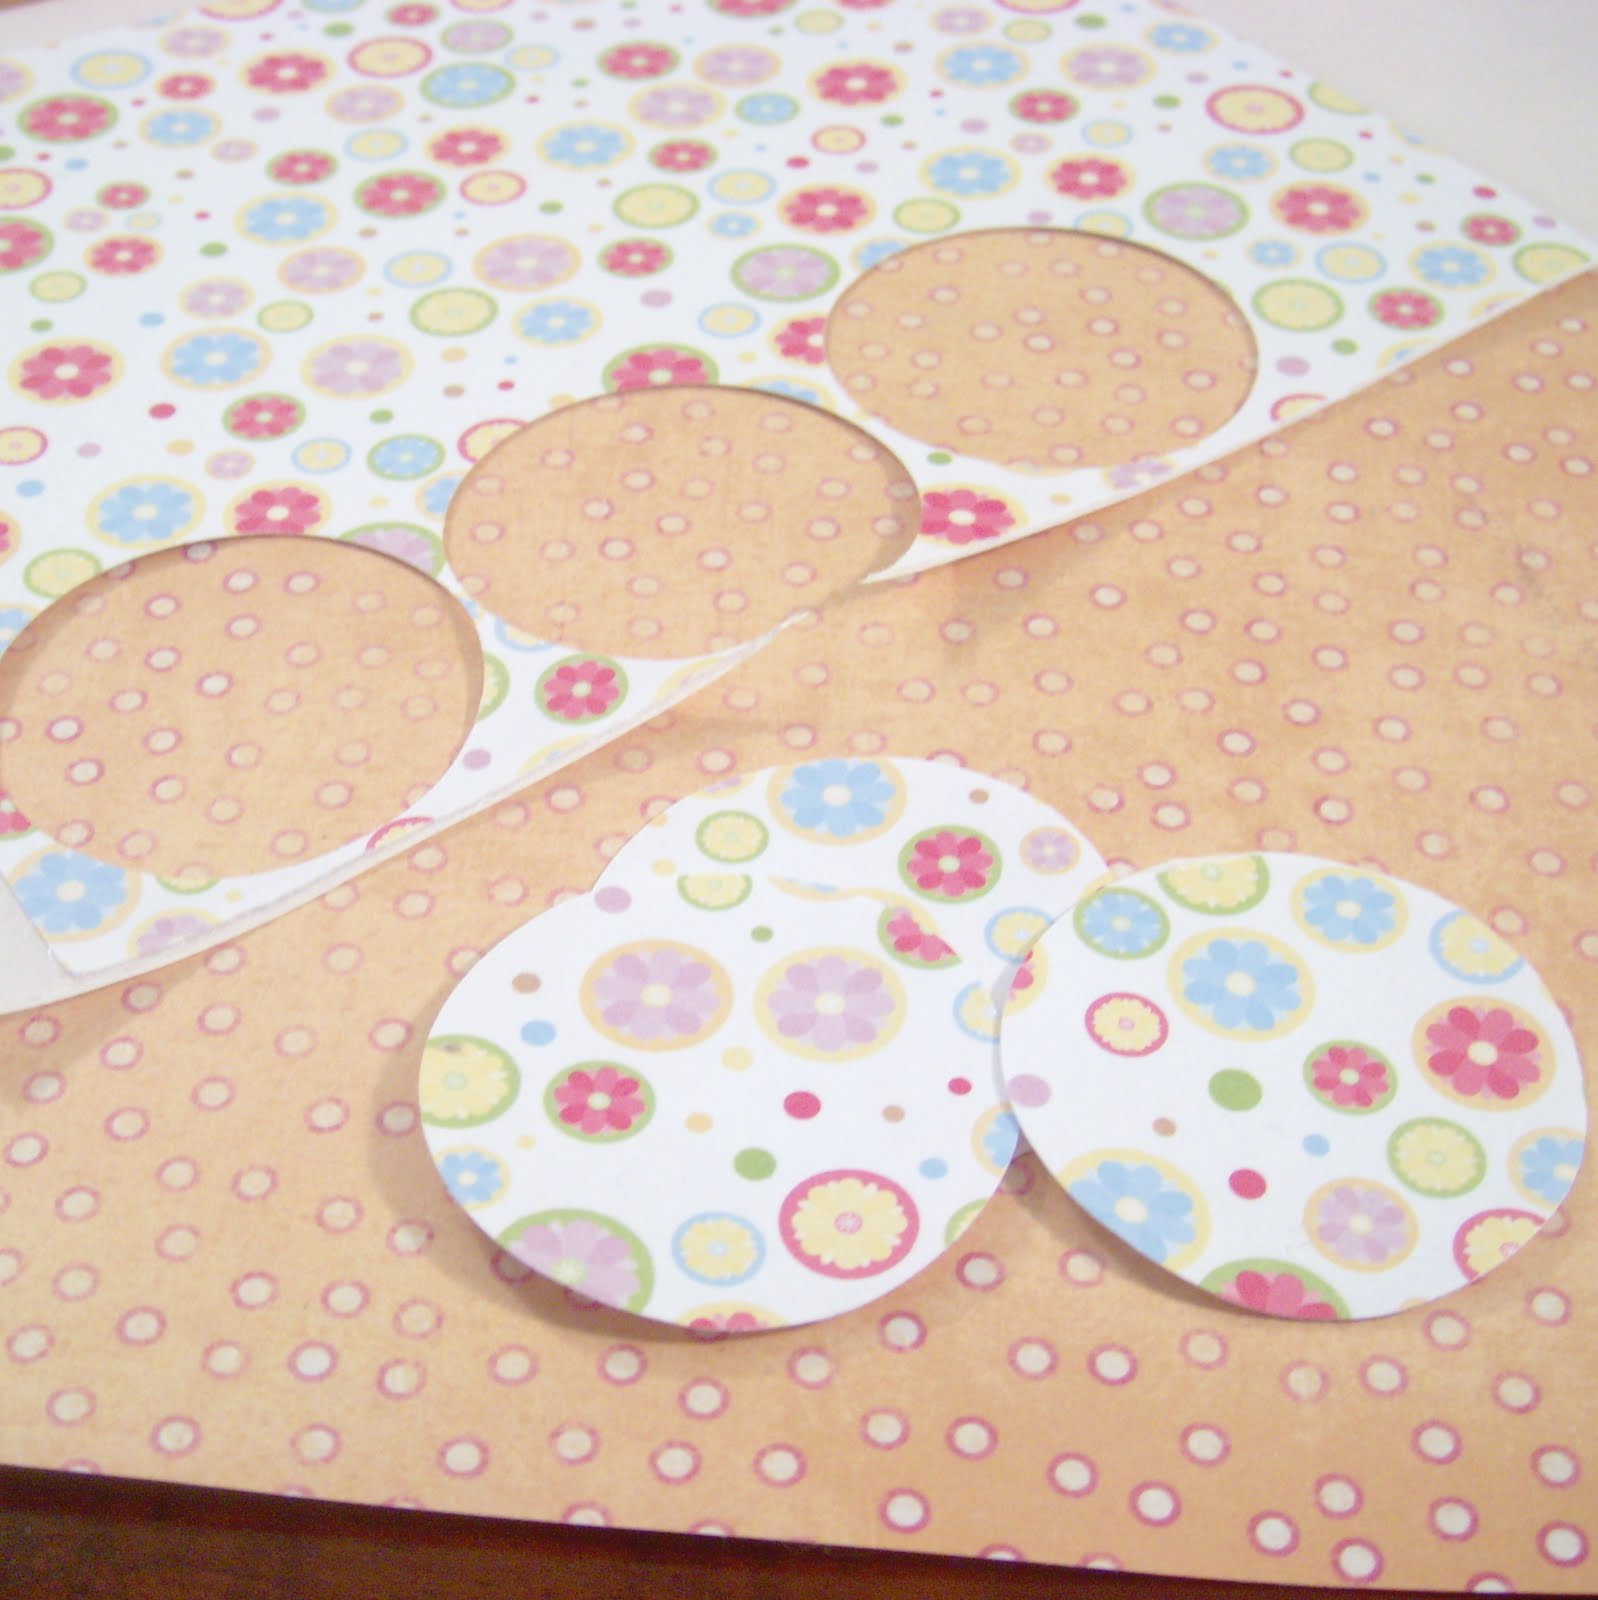
Stickers!  Just peel and stick!  They make a great base for stamping, too.  If you use heavier paper, they are easier to peel.  Just a tip.

Total time – 5-10 minutes

Price – practically nothing once you have the xyron.

Share this:

  • Click to print (Opens in new window)
  • Click to share on Facebook (Opens in new window)
  • Click to share on Twitter (Opens in new window)
  • Click to share on Pinterest (Opens in new window)
  • Click to share on LinkedIn (Opens in new window)
  • Click to share on Reddit (Opens in new window)
  • Click to share on Tumblr (Opens in new window)

Related

Filed Under: Crafts

About Greta Brinkley

Greta is originally from the West Coast. Now living in the Midwest, she loves hockey, sparkles, nail polish, and bright colors. She also cannot resist anything that has peanut butter and chocolate together. And she hates filling out bios. Yep.

« Sawdust Festival – Laguna Beach, CA
Fashion Friday: Caftans »

Trackbacks

  1. Meet Me on Monday – Week 3 #MMOM - How Was Your Day | How Was Your Day says:
    March 19, 2012 at 12:42 pm
    [...] link it up)   Hmmm…All of my blog posts are amazing!  I would say, though, that the Make Your Own Stickers project is easy and fun,  and can be dressed up or down.  /* Be Sociable, Share! [...]
  • Email
  • Facebook
  • Instagram
  • Pinterest
  • Twitter

About Me

Hi! I’m Greta, a Lifestyle and DIY expert. I’m originally from the west coast, and currently living in the Midwest. We’re mad about DIY and travel, lover of fashion and food, and slightly obsessed with trivia. And you can never go wrong with glitter, nail polish or hockey. Did I mention we were named one of the top DIY blogs?

"Want to work together, or just say hi? Drop me a line! WhyHelloGreta@gmail.com

As Seen On

Our Most Popular Posts

20 More Must Have Camping Essentials

How to Make Glitter Wine Glasses

Easy 10 Minute Hair Updo Tutorial

Custom Mudroom bench Ikea Hack

A Trip on the Grand Canyon Railroad

Newsletter

subscribe for email updates!

Copyright © 2022 · Foodie Pro Theme on Genesis Framework · WordPress · Log in

0 shares
 

Loading Comments...