How Was Your Day?

Upscale Ideas for a Conscious Casual Life

  • Home
  • Beauty & Fashion
    • Beauty
    • Fashion
  • DIY
  • Home & Garden
    • Home Decor
    • Gardening
    • Organizing
  • Food
  • Travel
  • Love & Money
    • Love
    • Money
  • 2019 Holiday Gift Guide
  • About How Was Your Day
  • Disclosure/Privacy Policy
  • Media PR Kit
  • Favorite Things
You are here: Home / Crafts / How To Make A Glitter Switch Plate – A Tutorial

How To Make A Glitter Switch Plate – A Tutorial

November 1, 2012 By Greta Brinkley

Sharing is caring!

27 shares
  • Share
  • Tweet

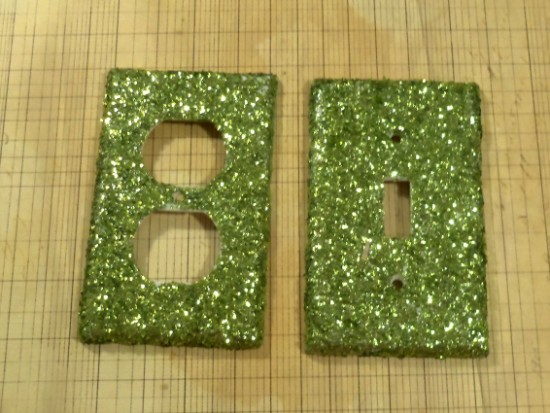
How To Make Glitter Switch Plates - A Tutorial


I love all things that are sparkly or glittery.  I’m not sure why, but glitter and sparkle just calls to me like a beacon.  When I saw a switch plate that had rows of crystals on it, I thought to myself  “Couldn’t you do that with glitter?” 

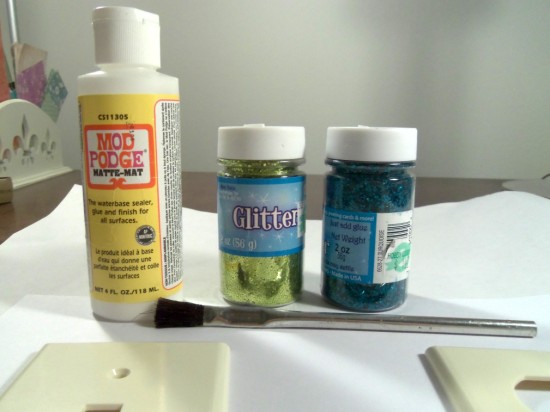
You will need:

Switch plate
Glitter
Mod Podge or other clear drying glue
Spray Sealer.  I used Krylon Triple Thick Clear. 

Glitter Switch Plate Supplies

Newspaper, or other protective surface covering
Brush for applying glue
Smaller paper, to save your glitter. 
Alcohol
Spray Box. 
 

How To Make a Glitter Switch plate:

Clean your switch plates really well.  I like to rub mine with alcohol to remove any kind of grease or residue.  Set aside to let dry. 

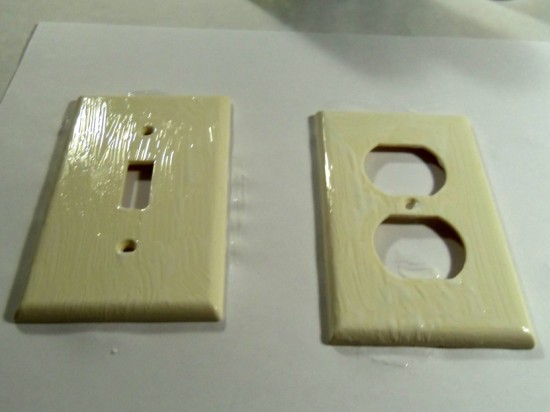
Glitter Switch Plate Tutorial

Coat your switch plates with glue.  Be sure to put on a thin, even coat. 

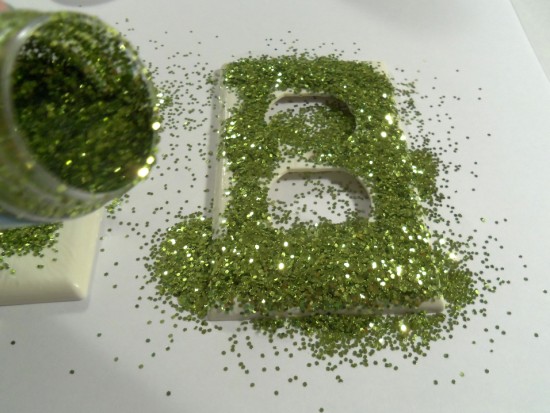
How to make a glitter switch plate

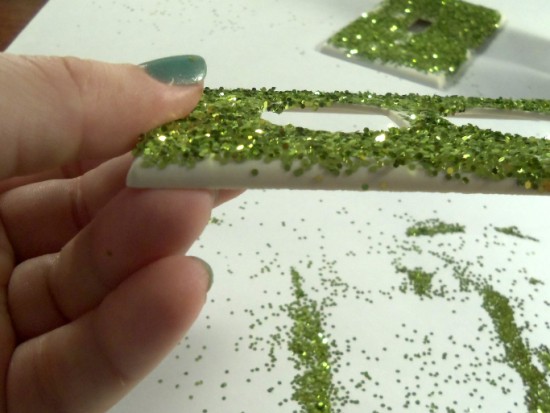
Place your switch plates on the smaller piece of paper.  Cover with glitter.  Shake excess glitter off switch plate and set aside.  Return glitter to container. 

Check your switch plate for any missed spots.  Apply glue and cover with glitter again.  Repeat until all spots are covered.  You can see where I didn't get the side of this covered with glue.

Glitter switch plate tutorial

Set aside and let dry completely. 

Once the switch plate is completely dry, spray with sealer, making sure to get the sides.  Set aside and let cure.  If it needs another coat after its dry, just spray it again. 

Helpful hint: You will want to use the spray sealer in a well ventilated area.  Use a spray box to help catch the overspray. 

Your Glitter Switch plate project is now complete.  Pretty easy, right? 

Total time: 1 day
Work time: 20 minutes

Investment Costs: About $20, including varnish, glitter, brush, and Mod Podge.  If you already have these items, your costs will be less.

Per piece cost: $0.45, depending on your glitter and switch plate.  I spent about $2 for the glitter and the switch plates came from Home Depot for about $0.15 each. 
 

Share this:

  • Click to print (Opens in new window)
  • Click to share on Facebook (Opens in new window)
  • Click to share on Twitter (Opens in new window)
  • Click to share on Pinterest (Opens in new window)
  • Click to share on LinkedIn (Opens in new window)
  • Click to share on Reddit (Opens in new window)
  • Click to share on Tumblr (Opens in new window)

Related

Filed Under: Crafts, DIY Christmas Guide, Home Decor

About Greta Brinkley

Greta is originally from the West Coast. Now living in the Midwest, she loves hockey, sparkles, nail polish, and bright colors. She also cannot resist anything that has peanut butter and chocolate together. And she hates filling out bios. Yep.

« LightAir Ionflow 50 Signature Air Purifier Revisited
Sandgrens Boots – Traditional, with a Modern Twist »

Trackbacks

  1. How to Glitter a Dollar Store Piggy Bank | How Was Your Day? says:
    January 24, 2014 at 12:50 pm
    […] am a huge fan of glitter.  I mean, what’s not to like?  It just seems to make everything feel a little more special.  […]
  2. How to Make Glitter Wine Glasses | A Tutorial says:
    January 20, 2015 at 10:45 am
    […] As we all know, glitter makes everything better. A lot of people refer to glitter as the herpes of craft projects, but I don’t feel that way. Nope. You just have to treat glitter right, and it will make you happy beyond measure.  I mean, I love me some glitter craft projects. […]
  • Email
  • Facebook
  • Instagram
  • Pinterest
  • Twitter

About Me

Hi! I’m Greta, a Lifestyle and DIY expert. I’m originally from the west coast, and currently living in the Midwest. We’re mad about DIY and travel, lover of fashion and food, and slightly obsessed with trivia. And you can never go wrong with glitter, nail polish or hockey. Did I mention we were named one of the top DIY blogs?

"Want to work together, or just say hi? Drop me a line! WhyHelloGreta@gmail.com

As Seen On

Our Most Popular Posts

20 More Must Have Camping Essentials

How to Make Glitter Wine Glasses

Easy 10 Minute Hair Updo Tutorial

Custom Mudroom bench Ikea Hack

A Trip on the Grand Canyon Railroad

Newsletter

subscribe for email updates!

Copyright © 2022 · Foodie Pro Theme on Genesis Framework · WordPress · Log in

27 shares
 

Loading Comments...