How Was Your Day?

Upscale Ideas for a Conscious Casual Life

  • Home
  • Beauty & Fashion
    • Beauty
    • Fashion
  • DIY
  • Home & Garden
    • Home Decor
    • Gardening
    • Organizing
  • Food
  • Travel
  • Love & Money
    • Love
    • Money
  • 2023 Gift Guides
  • About How Was Your Day
  • Disclosure/Privacy Policy
  • Media PR Kit
  • Favorite Things
You are here: Home / Crafts / How to Glitter a Dollar Store Piggy Bank

How to Glitter a Dollar Store Piggy Bank

January 24, 2014 By Greta Brinkley

Sharing is caring!

220 shares
  • Share
  • Tweet

glitter-piggy-bank--wm

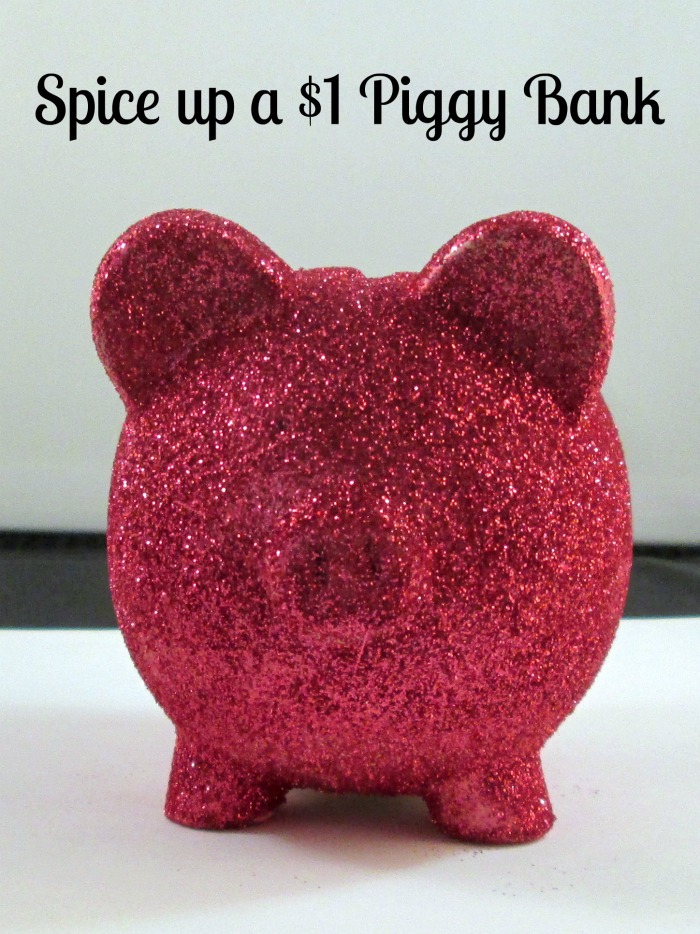
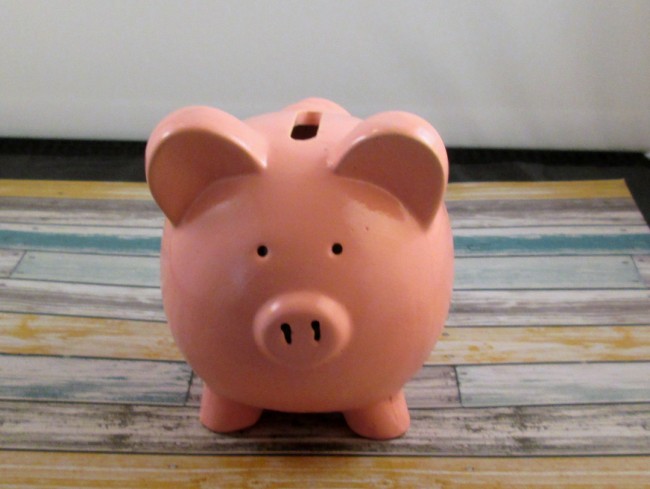
I am a huge fan of glitter.  I mean, what’s not to like?  It just seems to make everything feel a little more special.  Glitter is also a great way to jazz up something that’s plain or has even seen better days.  For this project, I took a plain ol’ piggy bank from the dollar store and decided to make it shine!

How to Glitter a Dollar Store Piggy Bank

Supplies needed

piggy-bank (650 x 489)

Piggy Bank
Fine or Ultra Fine Glitter – You’ll want a fairly large quantity.  You don’t use that much, but it makes life easier
Spray adhesive or mod podge
Spray sealer

Scrap paper
Paper towels
Fine grit Sandpaper

Directions

Clean the piggy bank.  I used a damp paper towel to wipe off the dust and dirt.  There wasn’t really any greasy residue.

My piggy bank had a matte, porous finish.  If yours has a glossy finish, you may want to rough up the surface by lightly sanding it.

piggy-bank-glued (650 x 653)

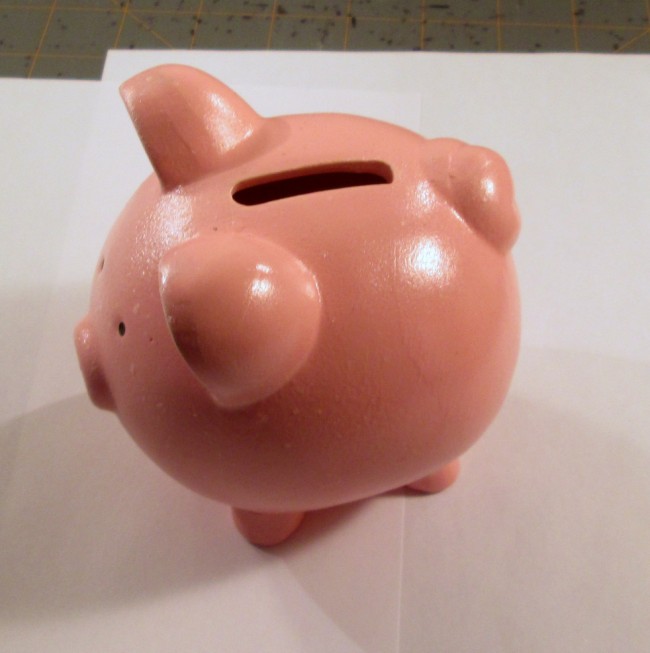
Spray with adhesive.  Be sure to get all sides and angles.  You want to do this outside, as spray adhesive has quite the odor.

glitter-piggy-bank-step-2 (650 x 651)

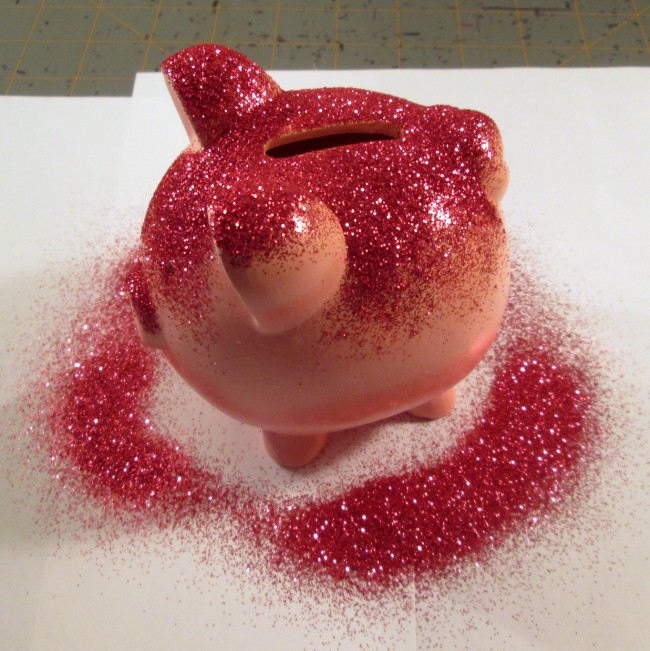
Place scrap paper down.  Place the piggy bank on the paper.  Sprinkle very liberally with glitter.

glitter-piggy-bank-step-3 (650 x 488)

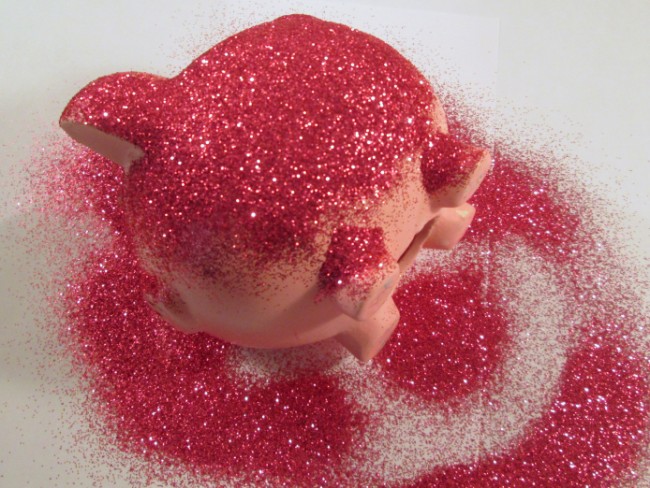
Roll the pig on the side and sprinkle glitter on the side.  Repeat for every angle.  Shake off the excess glitter & return to jar.

glitter-piggy-bank-step-4 (650 x 868)

If necessary, add more adhesive and sprinkle with additional glitter.  Shake off excess glitter & return to jar.  Let sit for a couple hours.

glitter-piggy-bank-4 (650 x 651)

If desired, finish your item with a spray sealer.  This helps to prevent the glitter from shedding and getting all over the place.

Total Cost:

$1 for the Piggy Bank
$3 for a jar of glitter
$8 for a can of Spray adhesive
$7 for a can of Spray Sealer

You use very little of the glitter, adhesive, and sealer.  Less than 1/10th of the can!

Total Time:

10 minutes work time, 2 hours or so dry time.

Tips:

If you use spray adhesive, and your glitter starts to melt, let it dry and switch to Mod Podge!

If your glitter melts, DO NOT use spray sealer.

Share this:

  • Click to print (Opens in new window)
  • Click to share on Facebook (Opens in new window)
  • Click to share on Twitter (Opens in new window)
  • Click to share on Pinterest (Opens in new window)
  • Click to share on LinkedIn (Opens in new window)
  • Click to share on Reddit (Opens in new window)
  • Click to share on Tumblr (Opens in new window)

Related

Filed Under: Crafts, Home Decor

About Greta Brinkley

Greta is originally from the West Coast. Now living in the Midwest, she loves hockey, sparkles, nail polish, and bright colors. She also cannot resist anything that has peanut butter and chocolate together. And she hates filling out bios. Yep.

« Organize Your Closet with Rubbermaid All Access Bins
Warm Up with these Olympic Inspired Cocktails »
  • Email
  • Facebook
  • Instagram
  • Pinterest
  • Twitter

About Me

Hi! I’m Greta, a Lifestyle and DIY expert. I’m originally from the west coast, and currently living in the Midwest. We’re mad about DIY and travel, lover of fashion and food, and slightly obsessed with trivia. And you can never go wrong with glitter, nail polish or hockey. Did I mention we were named one of the top DIY blogs?

"Want to work together, or just say hi? Drop me a line! WhyHelloGreta@gmail.com
2023 Holiday Gift Guide graphic
Be Part of our 2023 Holiday Gift Guide

As Seen On

Our Most Popular Posts

20 More Must Have Camping Essentials

How to Make Glitter Wine Glasses

Easy 10 Minute Hair Updo Tutorial

Custom Mudroom bench Ikea Hack

A Trip on the Grand Canyon Railroad

  • Email
  • Facebook
  • Instagram
  • Pinterest
  • Twitter
  • YouTube

I am a participant in the Amazon Services LLC Associates Program, an affiliate advertising program designed to provide a means for me to earn fees by linking to Amazon.com and affiliated sites.

Newsletter

subscribe for email updates!

Copyright © 2023 · Foodie Pro Theme on Genesis Framework · WordPress · Log in

220 shares
 

Loading Comments...