How Was Your Day?

Upscale Ideas for a Conscious Casual Life

  • Home
  • Beauty & Fashion
    • Beauty
    • Fashion
  • DIY
  • Home & Garden
    • Home Decor
    • Gardening
    • Organizing
  • Food
  • Travel
  • Love & Money
    • Love
    • Money
  • 2022 Holiday Gift Guides
  • About How Was Your Day
  • Disclosure/Privacy Policy
  • Media PR Kit
  • Favorite Things
You are here: Home / Crafts / DIY Washi Tape Switch Plate Cover Tutorial

DIY Washi Tape Switch Plate Cover Tutorial

December 11, 2013 By Greta Brinkley

Sharing is caring!

47 shares
  • Share
  • Tweet

Scotch Expressions sent us samples to play with.  This DIY washi tape switch plate tutorial was the result.

How to make a DIY washi tape switch plate

I have always been a fan of fancy switchplate and outlet covers.  I spent many an hour decoupaging switchplates, and everyone knew what they were getting for holidays.  Sometimes, if they were especially nice to me, I’d even take requests!

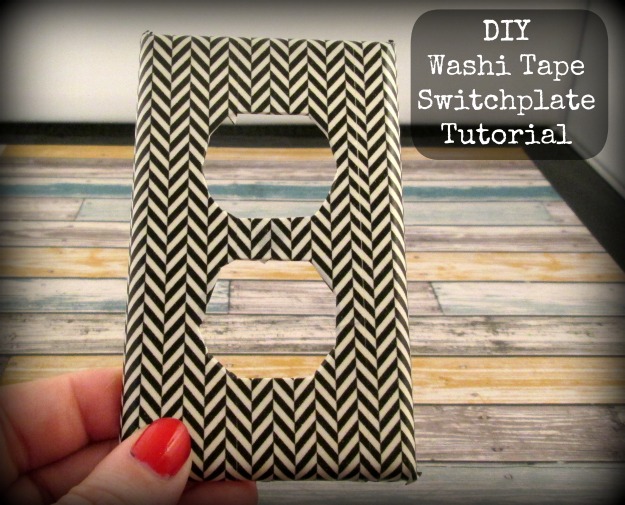
I still love to decorate switchplates and outlet covers.  They’re cheap, quickly interchangeable, and the possibilities are practically limitless.  You know what makes this project even easier?  Washi tape!  Yes, it’s true.  These are washi tape switch plates.  Here’s how to do it.


herringbone-washi-tape-outlet-cover (625 x 836)

How to Make a Washi Tape Switch Plate

Supplies needed:

washi-tape-switchplate-supplies (625 x 626)

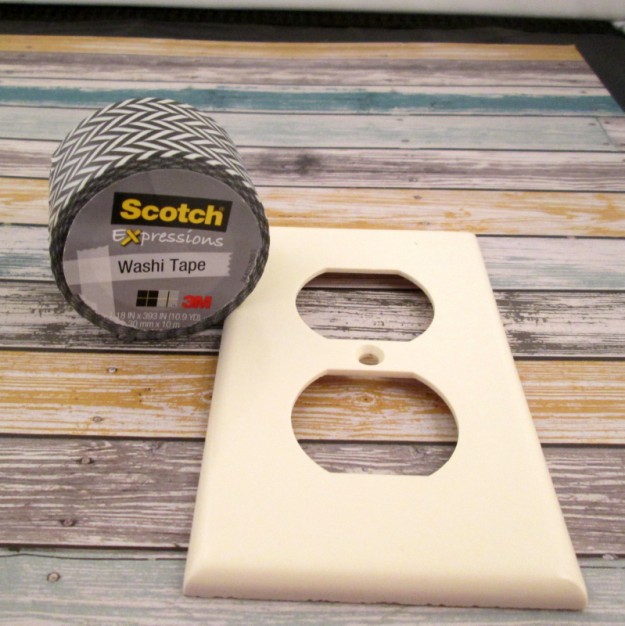
Switch plate cover.  These are about $0.20 at Home Depot or Lowes.

Washi Tape.  The herringbone pattern I’m using is pretty wide, and runs about $3-ish.

Directions

Make sure your switch plate is clean and free of dirt, debris, and grease.

washi-tape-switchplate-step-1 (625 x 626)

Get out your washi tape.  Unroll a section that’s about two inches longer that your switchplate.  Stick this to the your switchplate, starting at the edge.  Make sure that it’s straight with no wrinkles.

washi-tape-switchplate-step-3 (625 x 833)

I like to work directly from the roll, but you can cut the strip of tape off and work with just it.  Whatever makes you more comfortable.

washi-tape-switchplate-step-4 (625 x 834)

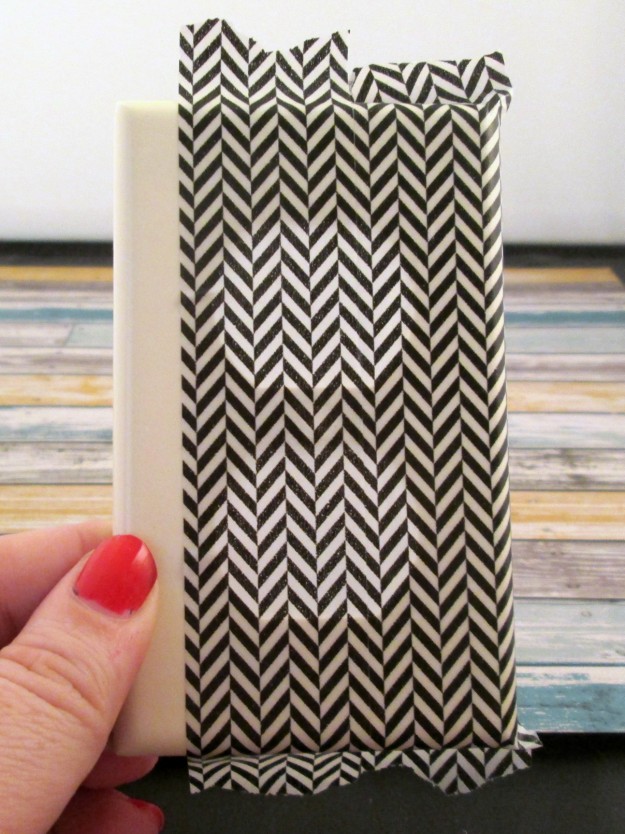
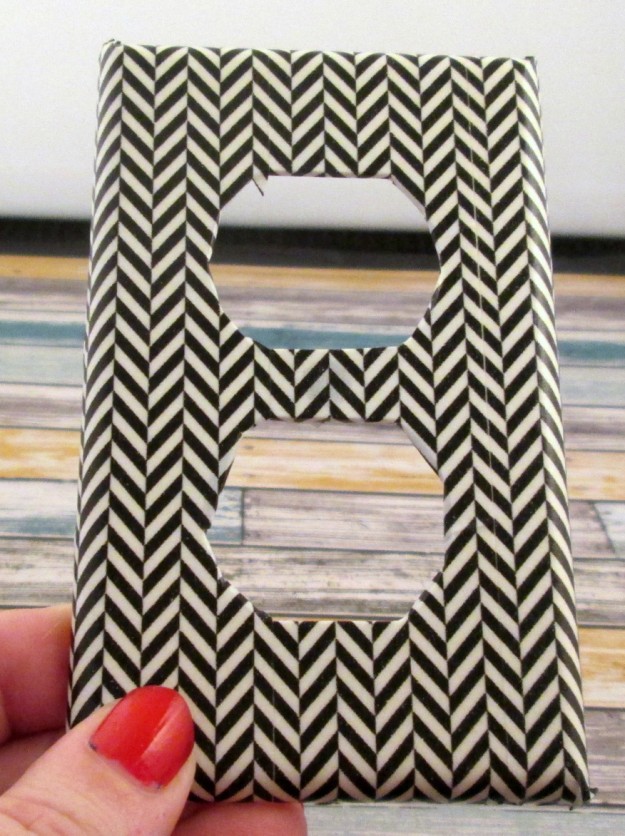
Unroll another section of washi tape that’s about 2 inches longer than your switchplate.  Here’s the tricky part – if your tape has a distinct pattern, you’ll want to match it up. The tape I chose had a herringbone pattern, so I matched the diagonal stripes. Stick this down to your switchplate, with the patterns matching.  Repeat until the rest of the switch plate is covered.

washi-tape-switchplate-step-5 (625 x 834)

washi-tape-switchplate-step-5-back (625 x 469)

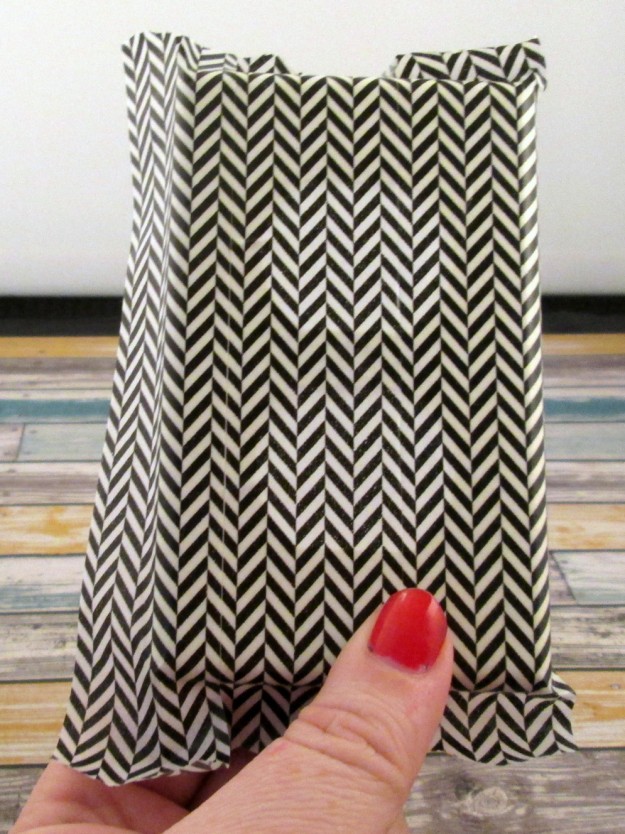
Now, you’ll need to trim the edges.  Make sure all the edges are stuck down really well.  Then, just cut around the edge with scissors.

washi-tape-switchplate-step-7 (625 x 624)

washi-tape-switchplate-step-9 (625 x 470)

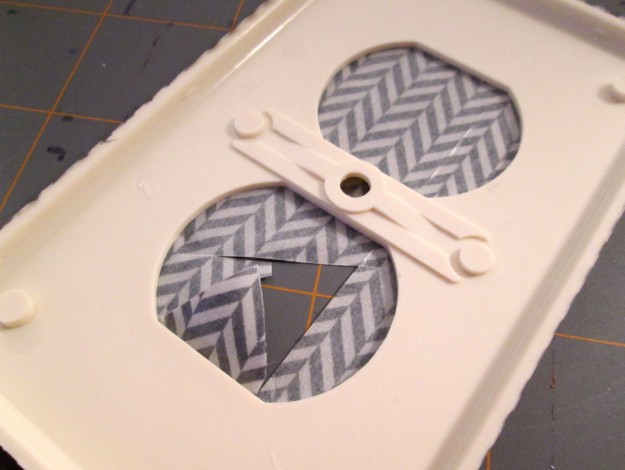
Next, you’ll want to be able to use your outlet or switch plate, right?  Of course you do!  Cut the tape in the holes.  To do this, I took the Xacto knife and made an X cut.  I then ran my knife straight across and then again vertically.  There may be pieces of tape that come off during this process, and that’s perfectly fine.  Just discard them.

washi-tape-switchplate-step-10 (625 x 470)

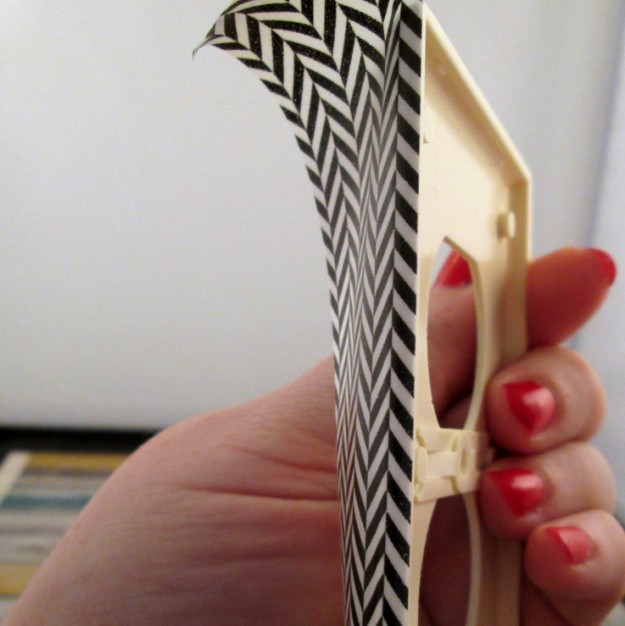
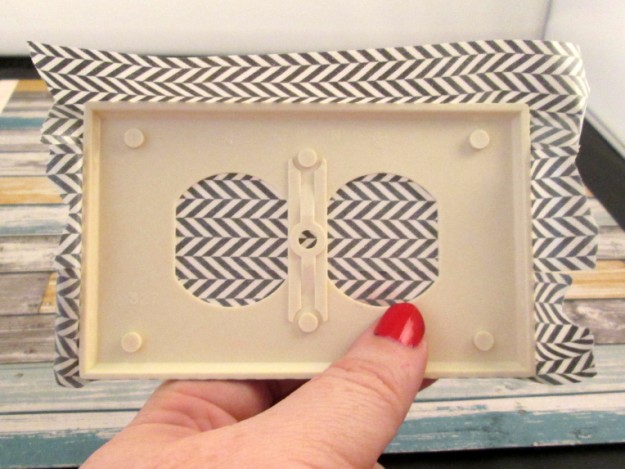
Fold the tape edges to the back of the switchplate. And stick them down.  You may want to add a few more cuts to get a smooth transition.  Poke a hole in the screw hole with a pen, pencil, or skewer.  Or the screw, which is normally what I do.

herringbone-washi-tape-outlet-cover (625 x 836)

Voila!  You’ve got a great washi tape switch plate that was super quick and easy.

Share this:

  • Click to print (Opens in new window)
  • Click to share on Facebook (Opens in new window)
  • Click to share on Twitter (Opens in new window)
  • Click to share on Pinterest (Opens in new window)
  • Click to share on LinkedIn (Opens in new window)
  • Click to share on Reddit (Opens in new window)
  • Click to share on Tumblr (Opens in new window)

Related

Filed Under: Crafts, DIY Christmas Guide, Home Decor

About Greta Brinkley

Greta is originally from the West Coast. Now living in the Midwest, she loves hockey, sparkles, nail polish, and bright colors. She also cannot resist anything that has peanut butter and chocolate together. And she hates filling out bios. Yep.

« Edimi Skin Care for Natural Solutions #GretaLovesHolidays
How to Say Happy New Years in 150 Different Languages »
  • Email
  • Facebook
  • Instagram
  • Pinterest
  • Twitter

About Me

Hi! I’m Greta, a Lifestyle and DIY expert. I’m originally from the west coast, and currently living in the Midwest. We’re mad about DIY and travel, lover of fashion and food, and slightly obsessed with trivia. And you can never go wrong with glitter, nail polish or hockey. Did I mention we were named one of the top DIY blogs?

"Want to work together, or just say hi? Drop me a line! WhyHelloGreta@gmail.com

As Seen On

Our Most Popular Posts

20 More Must Have Camping Essentials

How to Make Glitter Wine Glasses

Easy 10 Minute Hair Updo Tutorial

Custom Mudroom bench Ikea Hack

A Trip on the Grand Canyon Railroad

  • Email
  • Facebook
  • Instagram
  • Pinterest
  • Twitter
  • YouTube

I am a participant in the Amazon Services LLC Associates Program, an affiliate advertising program designed to provide a means for me to earn fees by linking to Amazon.com and affiliated sites.

Newsletter

subscribe for email updates!

Copyright © 2023 · Foodie Pro Theme on Genesis Framework · WordPress · Log in

47 shares
 

Loading Comments...