How Was Your Day?

Upscale Ideas for a Conscious Casual Life

  • Home
  • Beauty & Fashion
    • Beauty
    • Fashion
  • DIY
  • Home & Garden
    • Home Decor
    • Gardening
    • Organizing
  • Food
  • Travel
  • Love & Money
    • Love
    • Money
  • 2019 Holiday Gift Guide
  • About How Was Your Day
  • Disclosure/Privacy Policy
  • Media PR Kit
  • Favorite Things
You are here: Home / Crafts / DIY Washi Tape Candles

DIY Washi Tape Candles

January 15, 2015 By Greta Brinkley

Sharing is caring!

23 shares
  • Share
  • Tweet

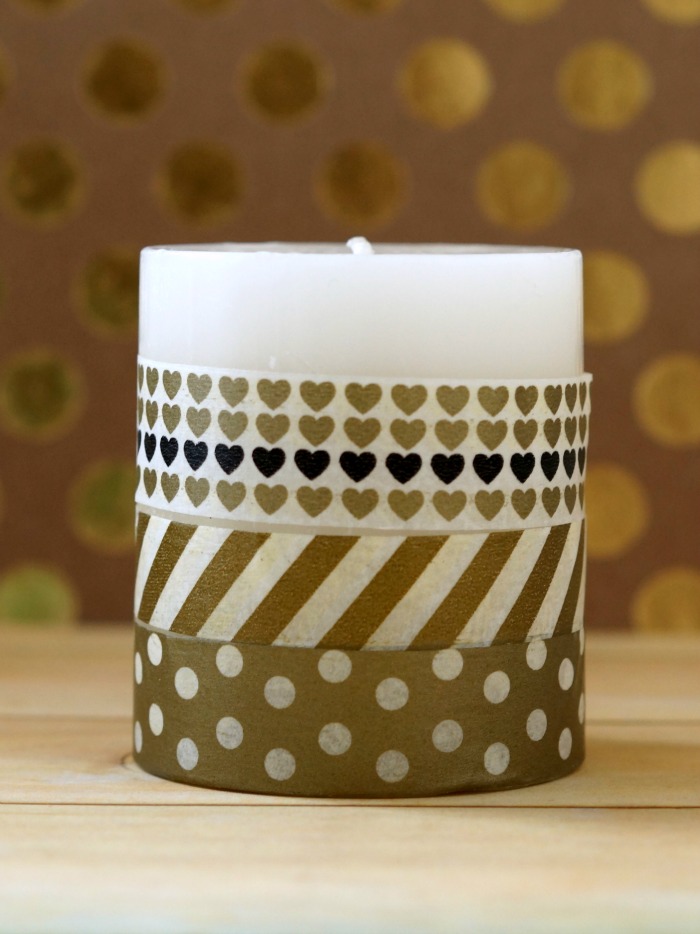
DIY Washi Tape Candles can really change the look of any room or event.

washi-tape-candles-wm

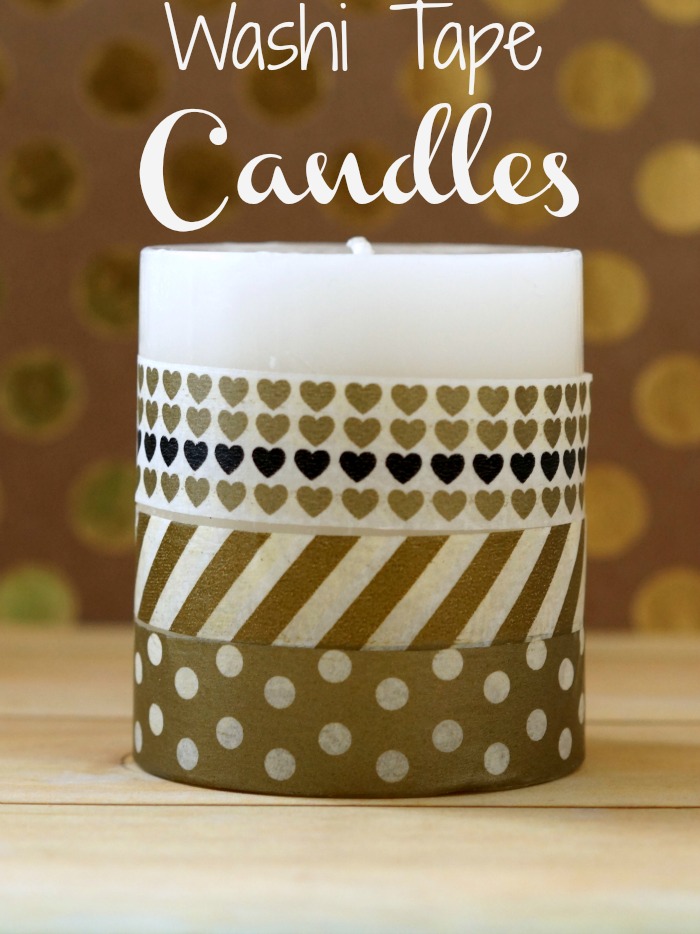
I was recently drafted for décor help for a gathering. Since we were putting this together last minute, and on a somewhat shoestring budget, we had to get creative. One of the main items we used were candles. But, how do we jazz these candles up quickly, and on a budget? Washi tape to the rescue! Oh yes. We made Washi Tape Candles!

Washi Tape Candles

Supplies

  • Candles
  • Washi Tape in coordinating colors and patterns.
  • Ruler
  • scissors


Directions

Unwrap your candle, making sure to get all of the plastic wrap off. There were a few where we failed on this step, and they didn’t look as good.

Give your candles a good wipe down with a paper towel or washcloth. We want to remove any grease or debris.

washi-tape-candle-step-1

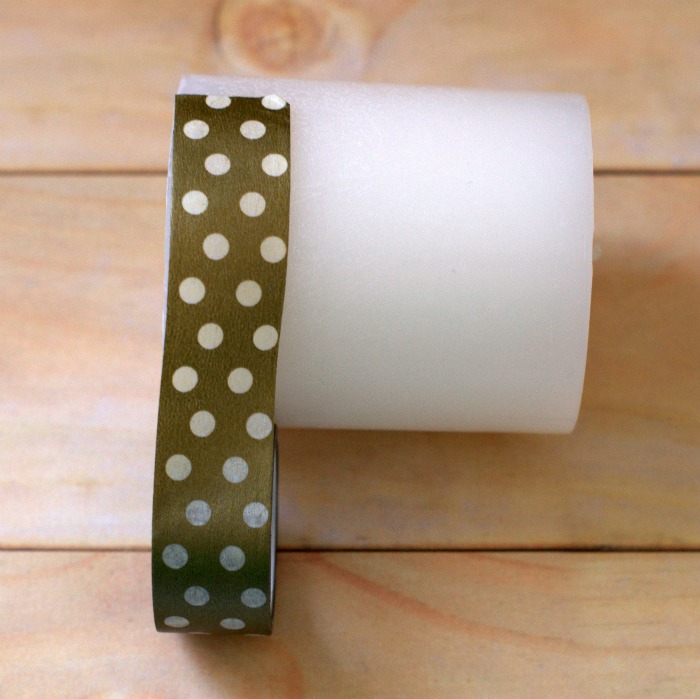
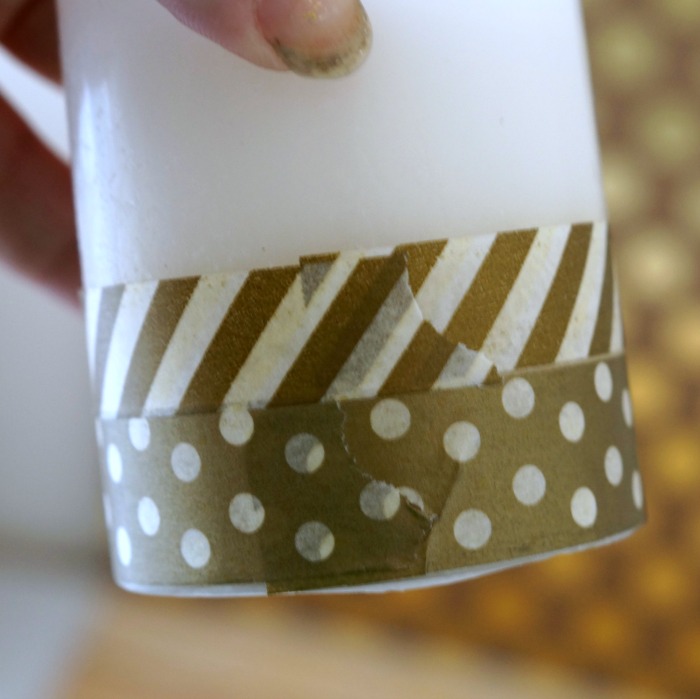
Take your washi tape, and stick one end to your candle. Now, wrap your tape all the way around your candle. Do this a bit slowly, to make sure that it’s on straight and is sticking to the candle. You also want to make sure it doesn’t have too many wrinkles.

washi-tape-candle-step-2

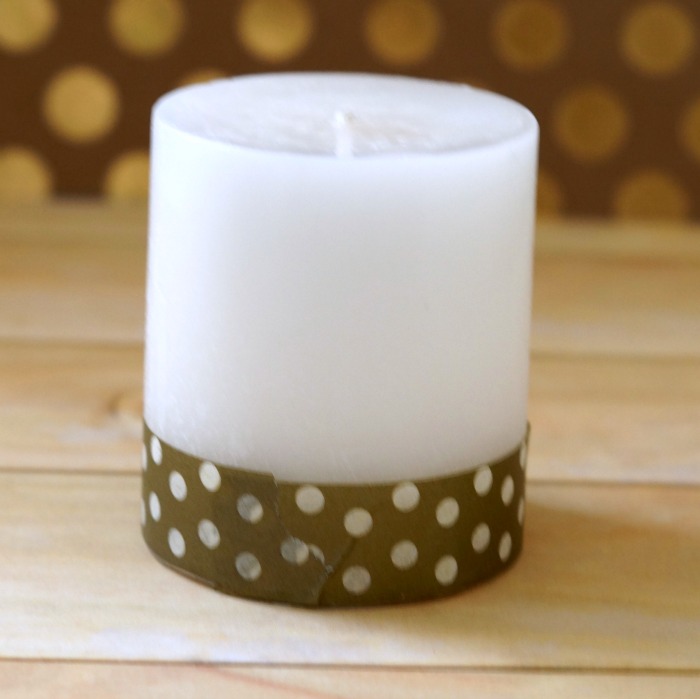
Overlap the washi tape ends slightly and cut or tear the tape off the roll.

If your paper tape is having difficulty sticking, burnish it down with a credit card or small squeegee for vinyl. This will really help your washi tape candle come together.

washi-tape-candle-step-3

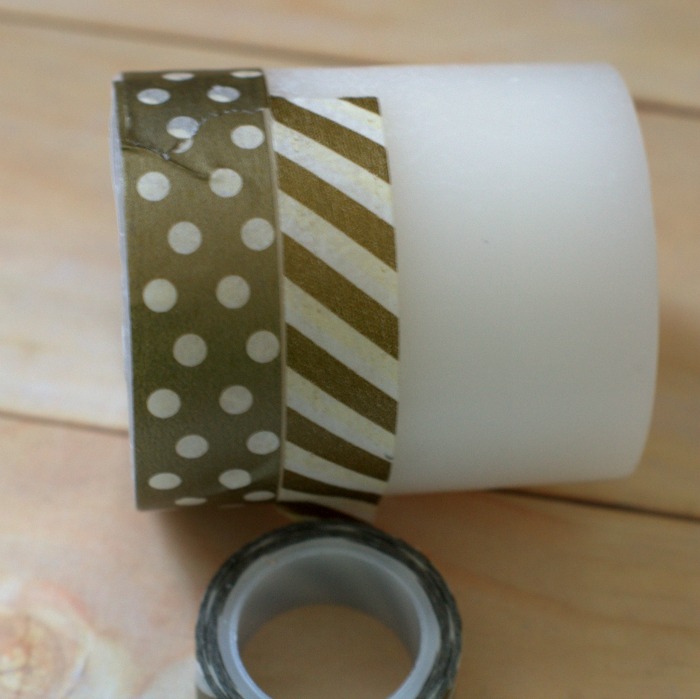
Take your next pattern of paper tape, and repeat the above steps. Repeat as desired, until you get the look you want. I found that 2-4 stripes looked the best for the washi tape candles.

washi-tape-candle-step-4

I like the look of the washi tape being around the bottom of the candles, but feel free to experiment.

After a couple hours, the washi tape and the candle will become one. It’s almost like a cool science experiment seeing the washi tape absorb the wax and the wax accept the paper. This melding will help your washi tape candles stay together.

washi-tape-candles-700

Total time: 5-10 minutes each.

Total costs: $1 for the candle + $5-8 for a set of washi tape.  You can get 8-10 candles of this size (sm pillar) from a set.

Will you be making washi tape candles?


Share this:

  • Click to print (Opens in new window)
  • Click to share on Facebook (Opens in new window)
  • Click to share on Twitter (Opens in new window)
  • Click to share on Pinterest (Opens in new window)
  • Click to share on LinkedIn (Opens in new window)
  • Click to share on Reddit (Opens in new window)
  • Click to share on Tumblr (Opens in new window)

Related

Filed Under: Crafts, Home Decor

About Greta Brinkley

Greta is originally from the West Coast. Now living in the Midwest, she loves hockey, sparkles, nail polish, and bright colors. She also cannot resist anything that has peanut butter and chocolate together. And she hates filling out bios. Yep.

« How to Save Money while Shopping Online
Why You Need Travel Insurance »
  • Email
  • Facebook
  • Instagram
  • Pinterest
  • Twitter

About Me

Hi! I’m Greta, a Lifestyle and DIY expert. I’m originally from the west coast, and currently living in the Midwest. We’re mad about DIY and travel, lover of fashion and food, and slightly obsessed with trivia. And you can never go wrong with glitter, nail polish or hockey. Did I mention we were named one of the top DIY blogs?

"Want to work together, or just say hi? Drop me a line! WhyHelloGreta@gmail.com

As Seen On

Our Most Popular Posts

20 More Must Have Camping Essentials

How to Make Glitter Wine Glasses

Easy 10 Minute Hair Updo Tutorial

Custom Mudroom bench Ikea Hack

A Trip on the Grand Canyon Railroad

Newsletter

subscribe for email updates!

Copyright © 2022 · Foodie Pro Theme on Genesis Framework · WordPress · Log in

23 shares
 

Loading Comments...