How Was Your Day?

Upscale Ideas for a Conscious Casual Life

  • Home
  • Beauty & Fashion
    • Beauty
    • Fashion
  • DIY
  • Home & Garden
    • Home Decor
    • Gardening
    • Organizing
  • Food
  • Travel
  • Love & Money
    • Love
    • Money
  • 2019 Holiday Gift Guide
  • About How Was Your Day
  • Disclosure/Privacy Policy
  • Media PR Kit
  • Favorite Things
You are here: Home / Home & Garden / DIY Bottle Tree Sculpture for Your Garden or Yard

DIY Bottle Tree Sculpture for Your Garden or Yard

April 23, 2018 By Greta Brinkley

Sharing is caring!

2.4K shares
  • Share
  • Tweet

Bottle tree sculpture is what we’re talking about today. Have you ever seen these interesting Bottle Tree sculptures in yards around your neighborhood? There are a few in my area, and when I first happened upon them, I was like “what in the world is that?!?! WHY would anyone want that in their yard???”

DIY bottle tree sculpture in front of fence

As I saw them more and more, they started to grow on me. Apparently, in the US, Bottle Trees are a southern thing, with their origins dating back to slave days.

The slaves believed that bottles would capture evil spirits and that the spirits wouldn’t be able to get out. When morning came, the sun would kill the spirits and ghosts. So they placed their empty bottles in the bottle tree and hoped for the best.

Fast forward to current days, and you still see some bottle trees made from actual trees or branches. But usually, they’re made from copper piping or wooden dowels.  We’re using copper pipe for this project.

How to Make a DIY Bottle Tree Sculpture

Links may be affiliate links. We may make a small commission if you purchase through them.

Supplies Needed

  • 1/2″ ×10′ copper pipe
  • 1/2″ copper tees (4)
  • 1/2″ copper street elbows, 45 degrees (8)
  • Large piece of cardboard, or something similar, to protect your working surface
  • Polyurethane glue
  • Water
  • Decorative bottles (5)
  • 1/2″ rebar, 36″ long
  • 16- or 18-gauge copper wire
  • Assorted large glass or acrylic beads

Tools Needed

  • Tape measure
  • Marking pen
  • Pipe cutter
  • Hammer
  • Wire cutter and needle nose pliers (optional)
  • Sponge or spray bottle
  • Eye protection, work gloves

Bottle Tree Direwctions

Don safety clothing, including eye protection and gloves. Using the pipe cutter, cut nine pieces of copper pipe that are each 6 inches long, two pieces that are 12 inches long, and two pieces that are 18 inches long. This will be the basic form of your bottle tree.

Gloved hands holding copper pipe

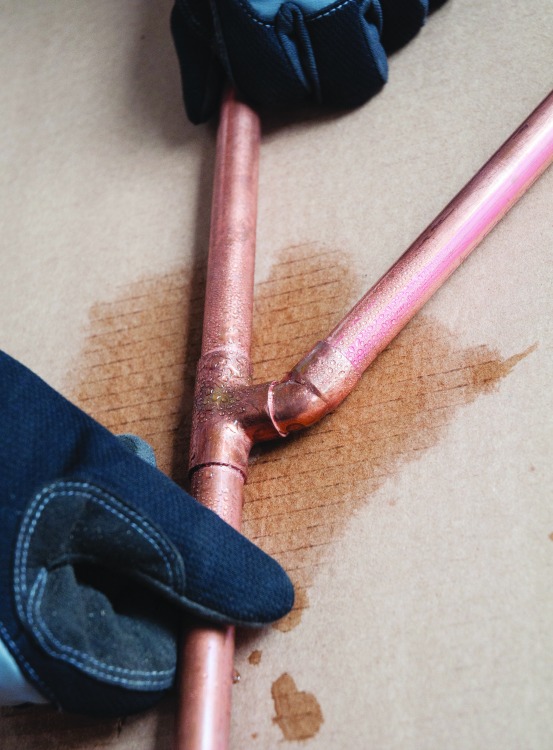
Glue one end of four 45-degree elbows into the stem of each tee, following the instructions on the polyurethane glue. Our glue called for pre-wetting one side of the gluing surfaces first. Using a spray bottle filled with water makes for quick and easy application. Push the tees and 45-degree elbow assemblies onto your working surface to ensure they’re flat.

When the connections are cured (about 24 hours), glue an 18-inch length of copper pipe onto the bottom of one elbow/tee assembly so the 45-degree elbow is facing left.

 
Copper pipe laid out before soldering
Continue the center assembly by gluing on a 6-inch length of pipe and then a tee with the second 45-degree elbow facing right. Continuing gluing on the remaining 6-inch lengths of pipe and the tees with the 45-degree elbows facing alternately right and left.

Glass bottle tree body with added branches

Glue two 12-inch lengths into each of the lower elbow/tee assemblies and two 6-inch lengths into each of the upper elbow/tee assemblies.

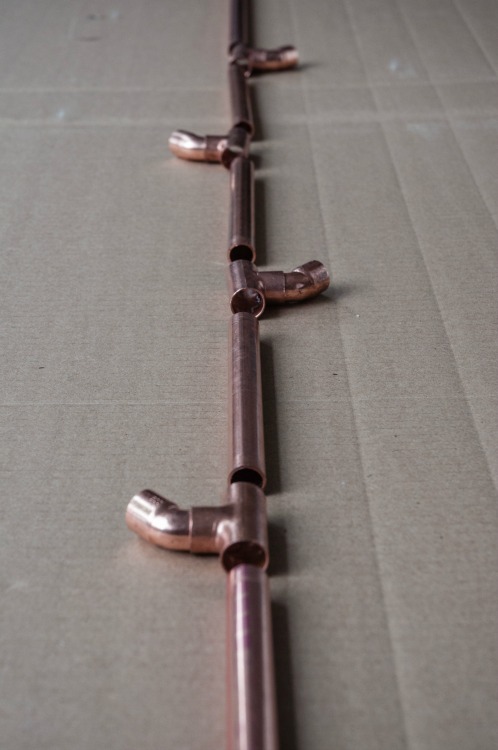
Glue the remaining 18-inch length to the top of the final tee. When gluing is complete, press the assembly firmly against your work surface to make sure all the fittings and pipe are flat.
Completed copper body for glass bottle tree sculpture on cardboard

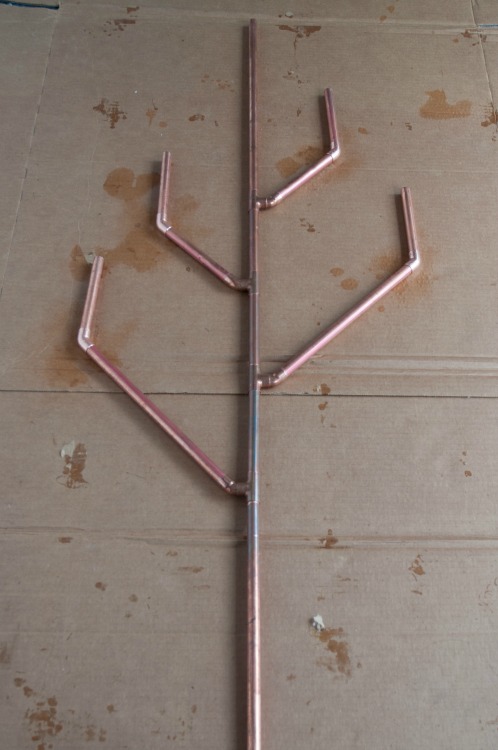
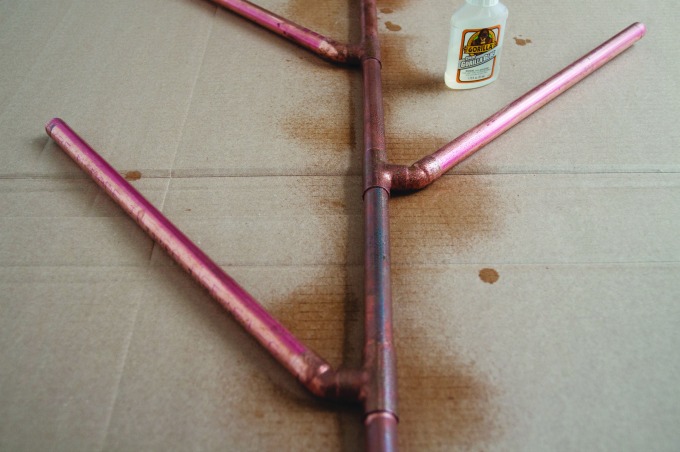
After the glue has cured, glue a 45-degree elbow to the end of each arm, and then glue a 6-inch length into each elbow.

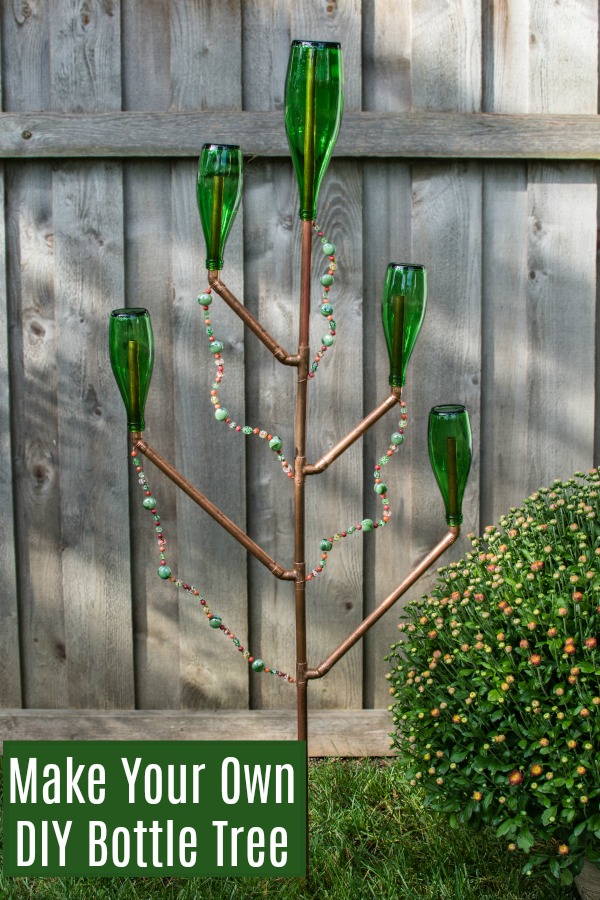
Optional: Using a needle-nose pliers, attach lengths of copper wire to the center trees. Slip beads onto the wire and secure the opposite ends to the pipe just below the lip of the bottle.

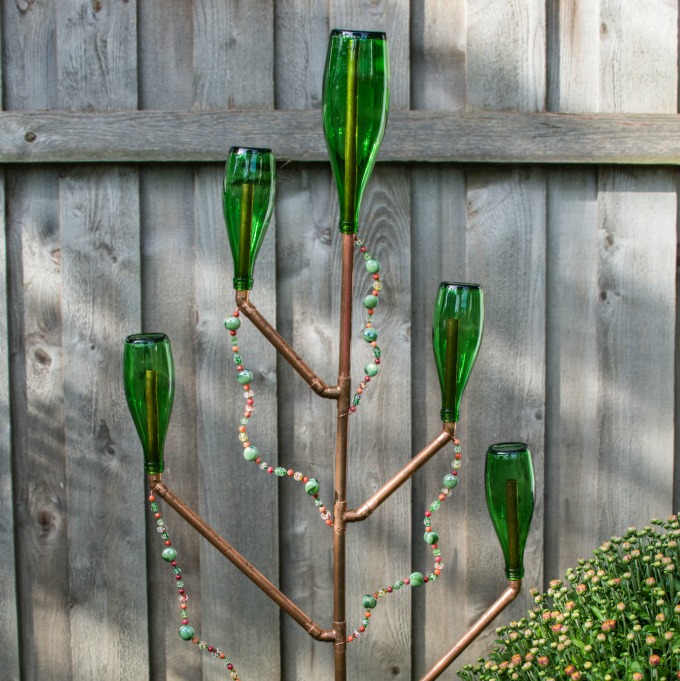
To install the bottle tree, drive the rebar into the ground with the hammer, and slip the center pipe over the rebar. Finish by slipping the five bottles onto the branches of the tree.

Ta-daaaa!!  Your bottle tree is done!

Glass bottle tree sculpture in front of fence


WARNING:
When installing rebar, beware of electrical wires, as well as any other utility services that may be buried underground.  You can have the utility company come out and mark them. In most areas, this is a free service that takes a day or two notice.
 
DIY bottle tree sculpture in front of fence


Reprinted with permission from the book Garden Builder by JoAnn Moser.

Share this:

  • Click to print (Opens in new window)
  • Click to share on Facebook (Opens in new window)
  • Click to share on Twitter (Opens in new window)
  • Click to share on Pinterest (Opens in new window)
  • Click to share on LinkedIn (Opens in new window)
  • Click to share on Reddit (Opens in new window)
  • Click to share on Tumblr (Opens in new window)

Related

Filed Under: Home & Garden, Crafts

About Greta Brinkley

Greta is originally from the West Coast. Now living in the Midwest, she loves hockey, sparkles, nail polish, and bright colors. She also cannot resist anything that has peanut butter and chocolate together. And she hates filling out bios. Yep.

« 10 Amazing Mexican Food Recipes You Need to Make
Give the Gift of Art with Minted »
  • Email
  • Facebook
  • Instagram
  • Pinterest
  • Twitter

About Me

Hi! I’m Greta, a Lifestyle and DIY expert. I’m originally from the west coast, and currently living in the Midwest. We’re mad about DIY and travel, lover of fashion and food, and slightly obsessed with trivia. And you can never go wrong with glitter, nail polish or hockey. Did I mention we were named one of the top DIY blogs?

"Want to work together, or just say hi? Drop me a line! WhyHelloGreta@gmail.com

As Seen On

Our Most Popular Posts

20 More Must Have Camping Essentials

How to Make Glitter Wine Glasses

Easy 10 Minute Hair Updo Tutorial

Custom Mudroom bench Ikea Hack

A Trip on the Grand Canyon Railroad

Newsletter

subscribe for email updates!

Copyright © 2022 · Foodie Pro Theme on Genesis Framework · WordPress · Log in

2384 shares
 

Loading Comments...