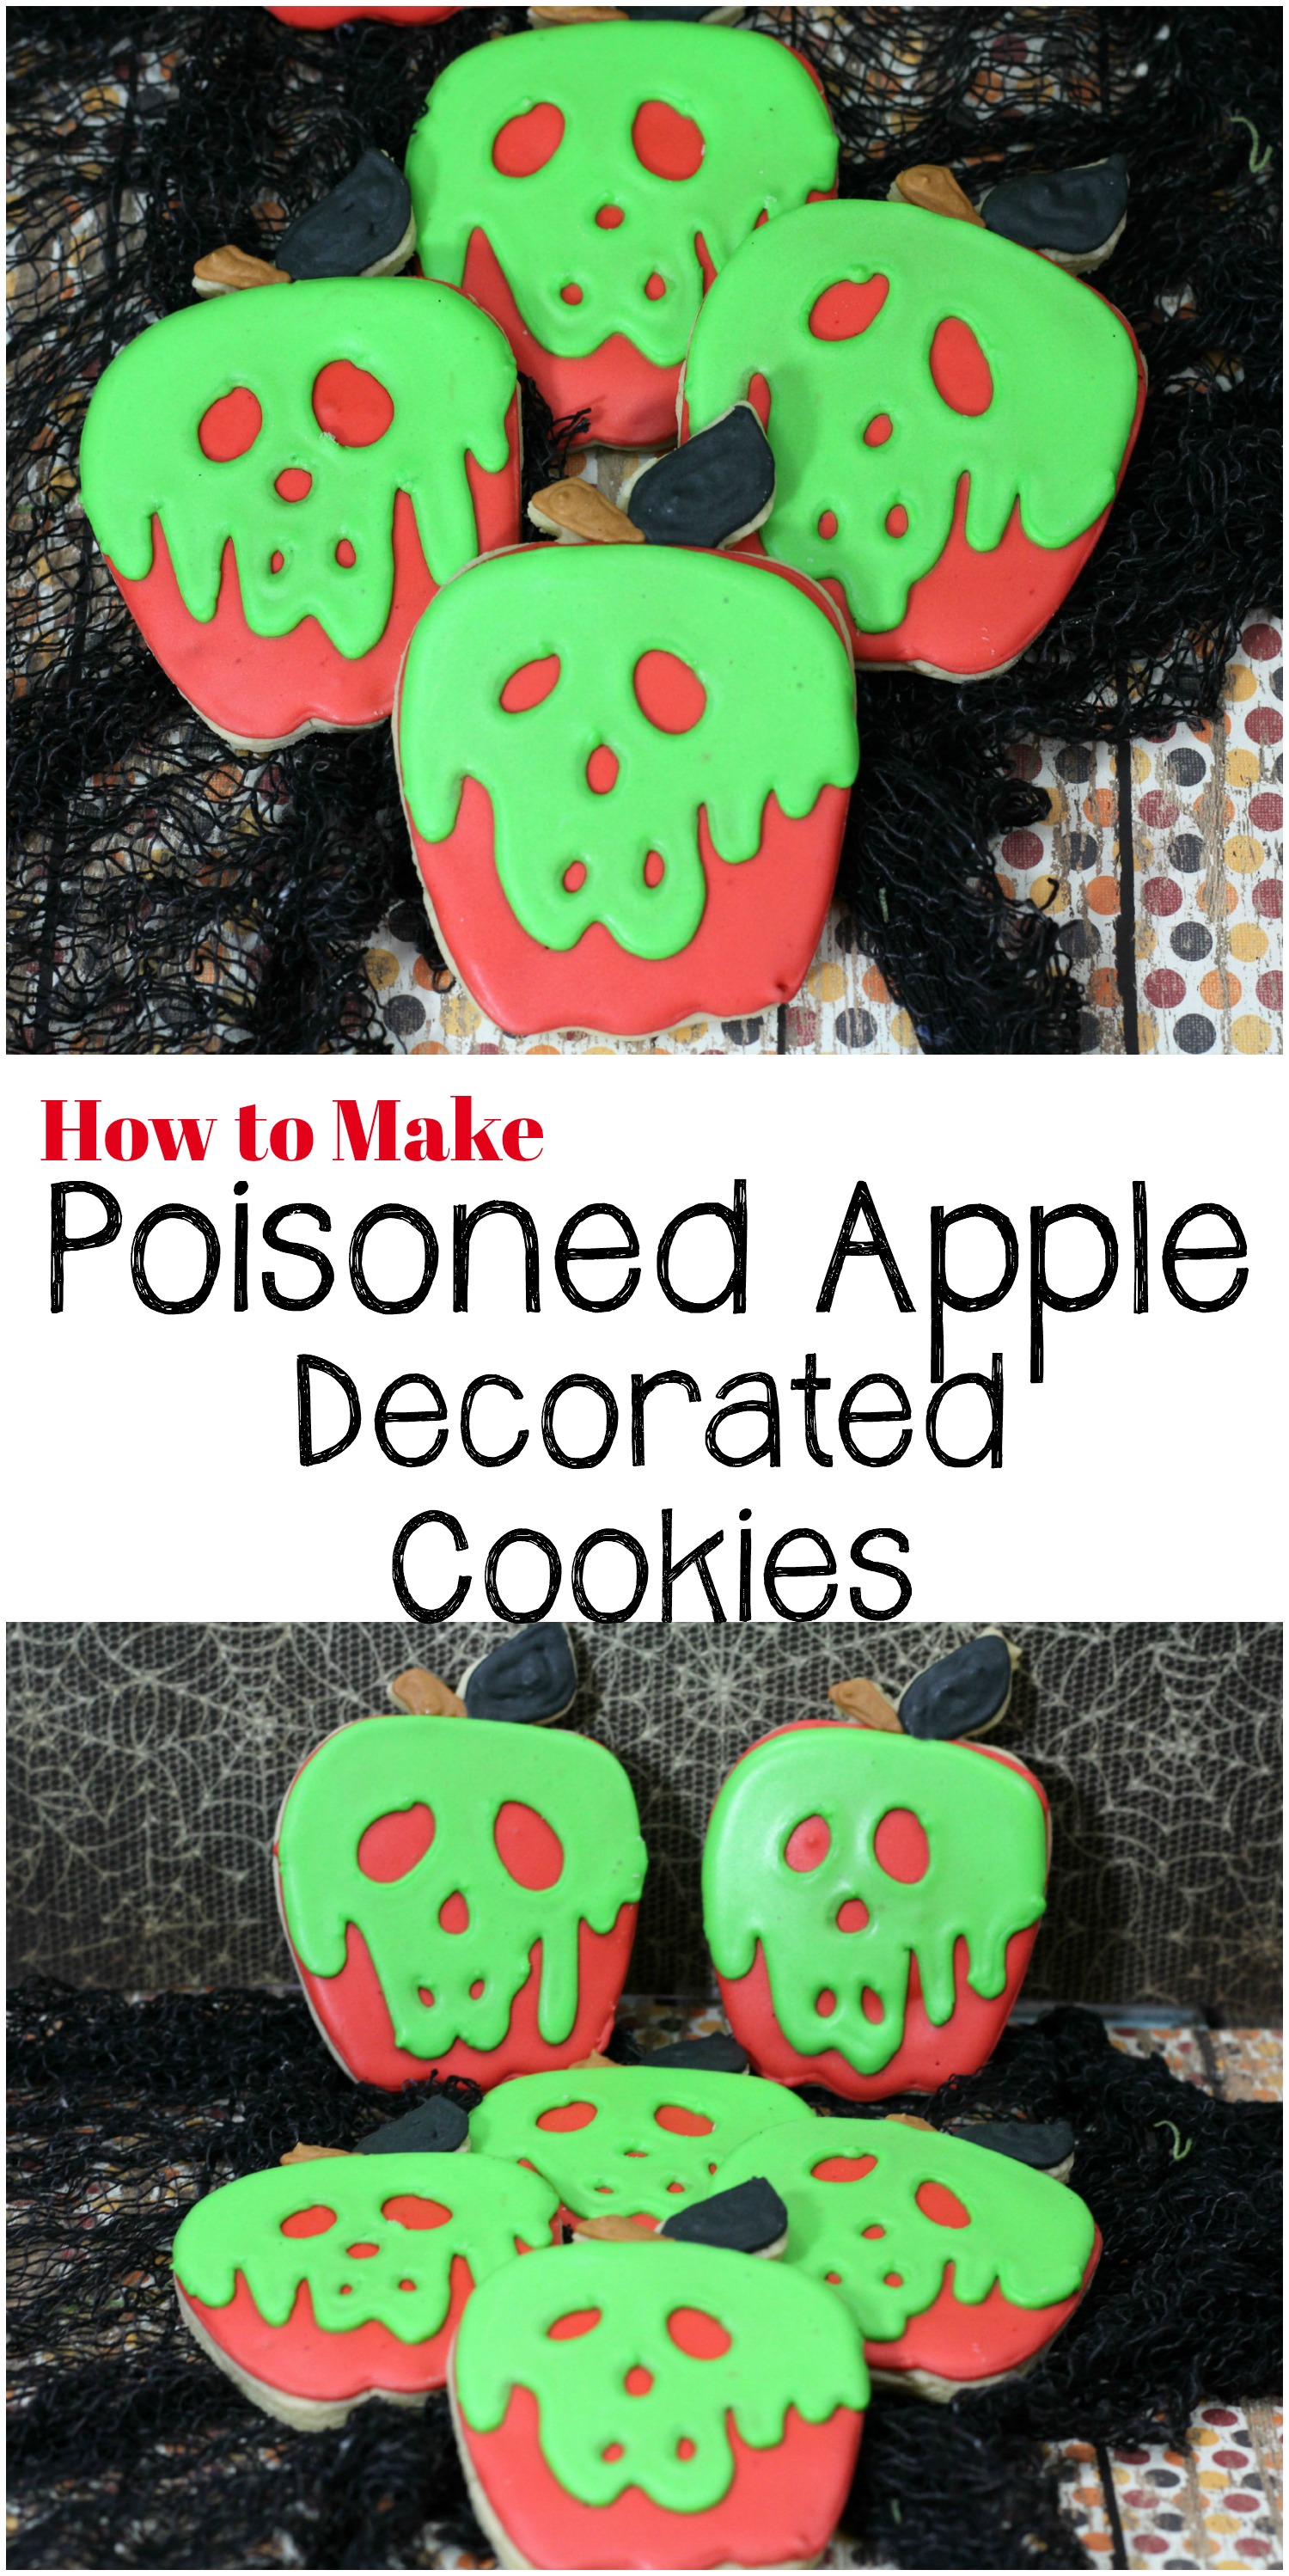
We all know and love the story of Snow White and the Seven Dwarves. It’s one of the classic fairy tales that almost every child grew up watching. One of the pivotal moments in the movie is when she eats the poisoned apple. I mean, that’s pretty much THE catalyst for the movie. Without her taking that apple, we don’t get the dwarves. We don’t get the romance. We don’t get the random guy creeping up to kiss what appears to be a dead girl. I try not to think about that last part too much. Anyway…to celebrate Halloween, we’re making Poison Apple Sugar cookies that look like Snow White’s apple. WHOA!
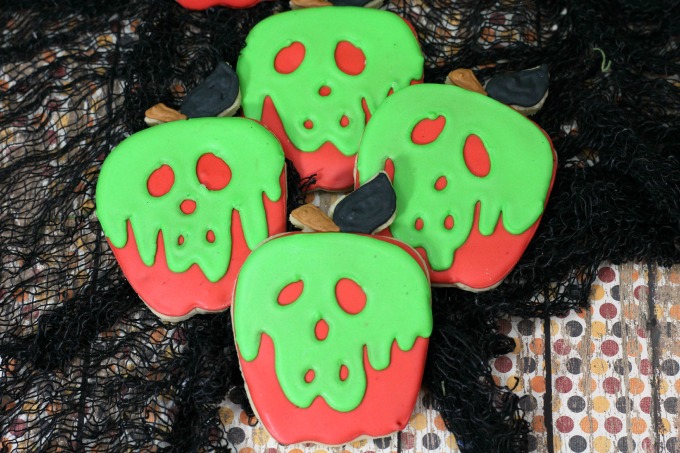
These take a little bit of work and a little skill. I’m not gonna lie and say they’re simple, quick, and easy. They’re not. They take some effort. BUTTTTT…once you get the hang of it, they’re not really difficult. Plus, all that effort really pays off in the end. These cookies are so classically Halloween, and they look as good as they taste. The frosting is what really makes these cookies pop. The green and red work perfectly together, and they really do look like slime-covered poison cookies. I’m still not sure exactly how Snow White fell for this when these apple cookies are so obviously “poisoned”, but that’s another thing I try not to think about too much.
These aren’t the only fun and tasty cookies you can make for Halloween, either. Try the Jack Skellington Nightmare Before Christmas cookies, too! They’re another tasty cookie you can make icing magic with. Once you’ve gotten the hang of these, my Jack Skellington cookies will be a breeze.
Snow White’s Poison Apple Decorated Sugar Cookies
Links may be affiliate links.
Snow White's Poisoned Apple Decorated Sugar Cookies

Decorated cookies that look like Snow White's poisoned apple. Perfect for Halloween, or a really creepy get together.
Ingredients
For the cookies
- 1 1/2 C soft butter
- 2 C granulated sugar
- 4 eggs
- 1 tsp Vanilla
- 5 C flour
- 2 tsp baking powder
- 1 tsp salt
For the Royal Icing
- 2 egg whites
- 1 C powdered sugar
- 1/2 tsp cream of tartar
- Red, brown, black, and green gel food coloring
Instructions
- In a large mixing bowl, cream the softened butter and sugar until the combination is fluffy and smooth.
- Add eggs to the butter-sugar mixture, one at a time, mixing each in thoroughly. Add the vanilla with one of the eggs.
- Sift the flour, baking powder, and salt together.
- Add the flour mixture to the wet ingredients in two additions. Mix well.
- Form the dough into a ball, and wrap it in plastic wrap. Make sure to completely cover the entire dough ball.
- Chill the dough for about 3 hours until firm, or overnight. The dough will chill faster if you make two balls, and flatten them into 2 disks. Wrap each separately in plastic wrap.
- Preheat oven to 325 degrees.
- Sprinkle flour liberally on the counter, rub flour on the rolling pin,and sprinkle some flour on the dough to keep it from sticking to the counter and rolling pin.
- Roll the dough out to approximately ¼” thick; use your APPLE cookie cutter to cut out your cookies.
- Line the cookie sheet with parchment paper, or spray with non-stick spray.
- Place the cut cookie on the cookie sheet, making sure they're about an inch apart. A metal spatula will help with this.
- Bake at 325 degrees for 8 to 10 minutes, until edges are lightly browned.
- Remove cookies from cookie sheet, and place on a wire rack to cool completely before frosting and decorating.
For the Icing
- Combine egg whites, powdered sugar and cream of tartar in a large mixing bowl. Mix with an electric mixer on medium speed for 4 minutes. If icing is too runny, add ¼ cup powdered sugar.
- Put 1/4 C of icing in two small bowls. Divide the remaining icing in half. Color one of the small bowls with brown gel food coloring, and the other with black gel food coloring.
- Take the larger bowls of icing, and color one green and one red. It may take quite a bit of gel coloring to get a deep red color
- Spoon each of the icings into individual frosting bags with a #5tips; twist the open end of the bag to push the icing to the tip.
- With the remaining red and green icing in the bowls, thin with a small amount of water, approximately ½ to 1 tsp., so it flows when spread. This will be used to fill in most of the cookie color
To Decorate
- Completely red apple cookies: outline it in red except for the stem and leaf.
- Allow the red outline at least 30 seconds to dry before filling the
- body of the cookie in with the thinned out red icing. After outlining all the apple cookies you can push the remaining icing into your bowl of red icing.
- Using a table knife or a small offset spatula, spread a small amount of the thinned red icing and allow it to flow to fill in the outlined portion of your cookie.
- Use the cookie photo as an example of the green icing placement.
- Using the green gel colored icing in the frosting bag, outline to make your outline for the green face, remembering to outline the eyes, nose, and mouth.
- Allow the outline to set as before, then fill in the rest of the face outlined on the red apple with the thinned out green icing.
- Outline the stem with brown icing on all of the apple cookies. Thin the remaining brown icing slightly and use it to fill in stems.
- Outline the leaf with the black icing on all of the apple cookies; thin
- remaining black icing slightly and use to fill in leaves.
- Allow frosting to completely set up and dry - at least 4 hours. DO NOT STACK UNTIL COMPLETELY DRY.
Nutrition Information:
Yield:
30Serving Size:
1Amount Per Serving: Calories: 236Total Fat: 10gSaturated Fat: 6gTrans Fat: 0gUnsaturated Fat: 3gCholesterol: 49mgSodium: 197mgCarbohydrates: 33gFiber: 1gSugar: 17gProtein: 3g
Nutritional information is provided as a courtesy, and may not be accurate.

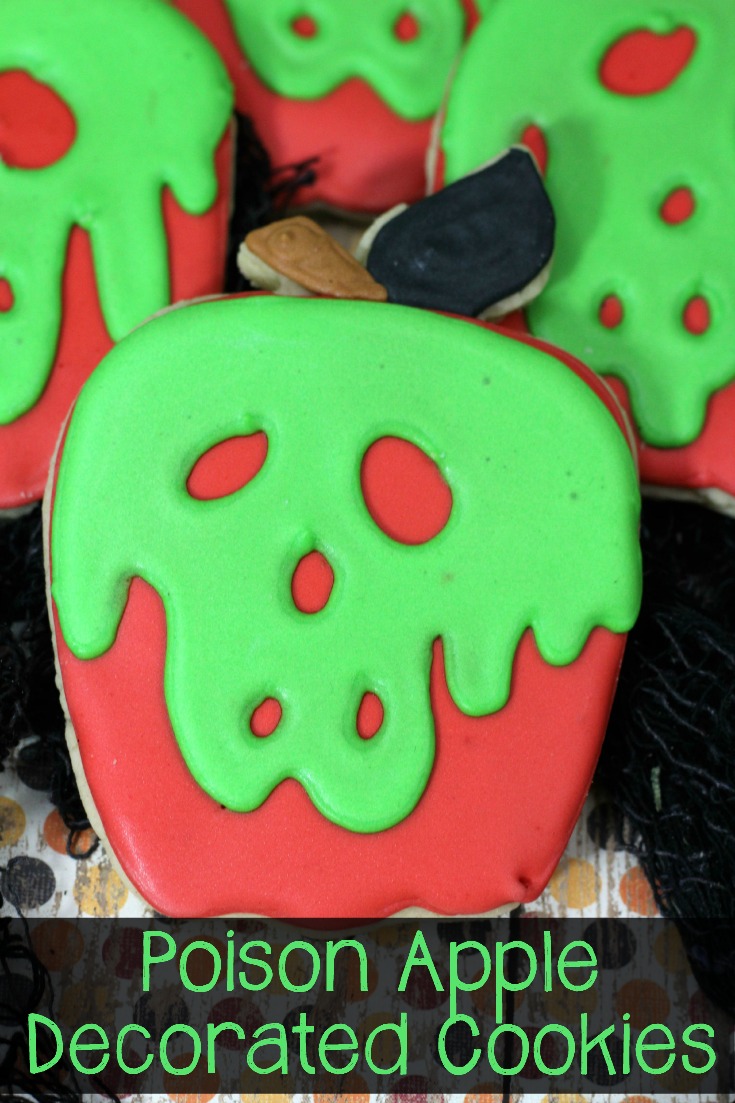
See now? That wasn’t terribly difficult to do. It really just takes some practice and some patience to make gorgeously decorated cookies. Once you get your poison apple cookies skills dialed in, you’ll be making up batches of tasty, spook-tacular Halloween cookies that everyone will enjoy. Get your baking supplies and get ready to make some great cookies that will have everyone begging for more. Don’t worry, no one will end up in a coffin in the middle of the woods.